Documents that contain sensitive information often require approval prior to being published for visibility. Power Automates can easily be used to streamline and automate this task. To get started, there are already several templates to get started.
Note that for any template, some specific logic will inevitably be required. So the ready-to-use template would require some minor “no code” logic to get the Flow to work within your environment for your users.
In this article, we are creating a Power Automate flow as for when a document gets uploaded to a library and the approval process gets started.
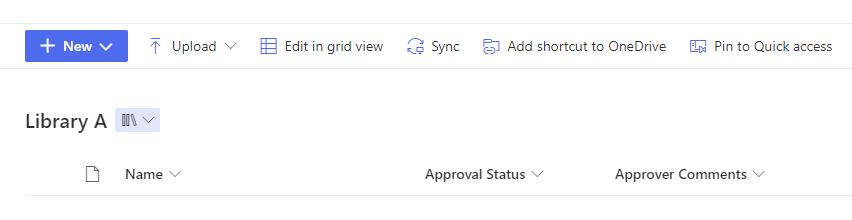
To begin, you would first want to have a Library created where the uploading/creating of the documents is intended for publishing, even if the original folder it is created or uploaded in, is in a different location.
When a Document is uploaded or created, a Power Automate flow then triggers the Approval notification.
Setting up the Flow-
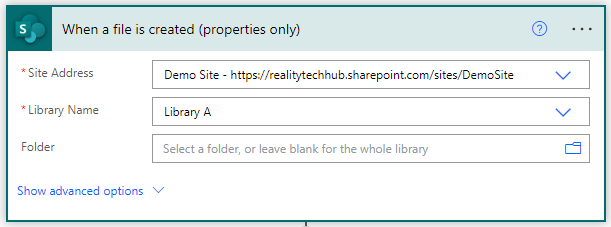
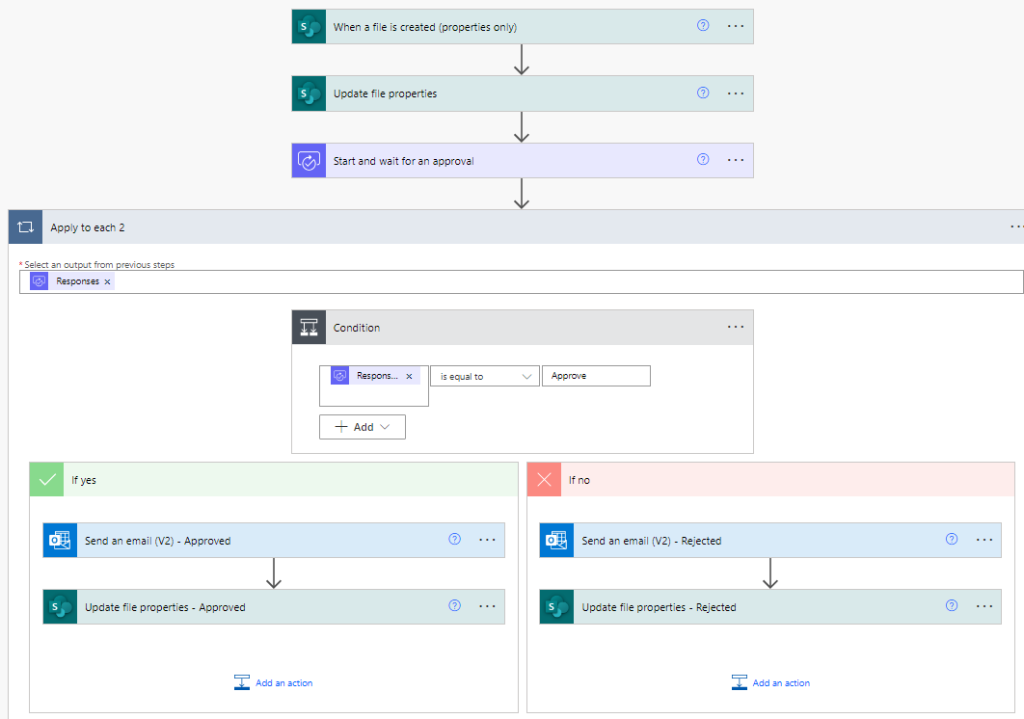
- Create a New Automate Flow called “Approval Flow” and select “When a file is created (properties only)” as the trigger action.
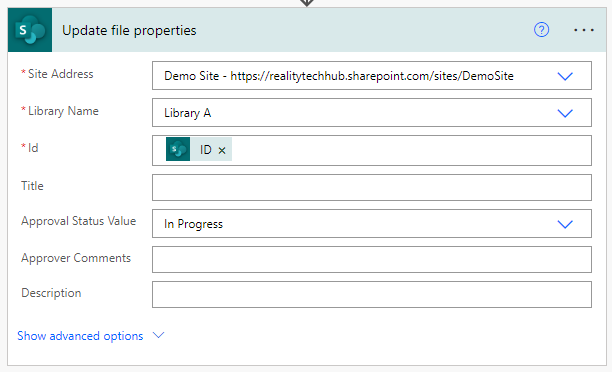
Add another action called “Update File Properties”. Within this action we change the Approval Status in the Library. This is a metadata field we can adapt or configure with values of our choice.
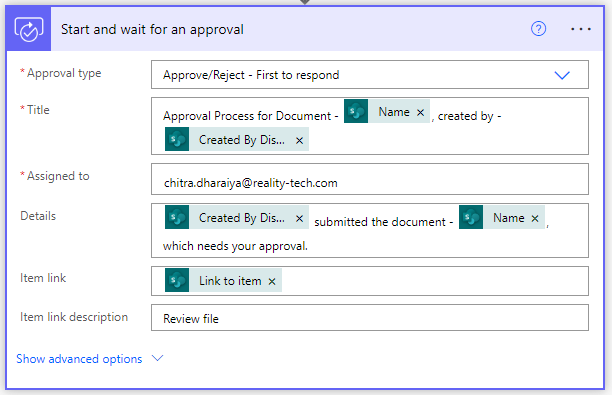
We can then Add the “Start and Wait for an Approval” action where the Approval email is sent to the Approver and the Approver decides whether to Approve/Reject the document. Select the option – “Approve/Reject – First to respond”,

Add the information in the action,
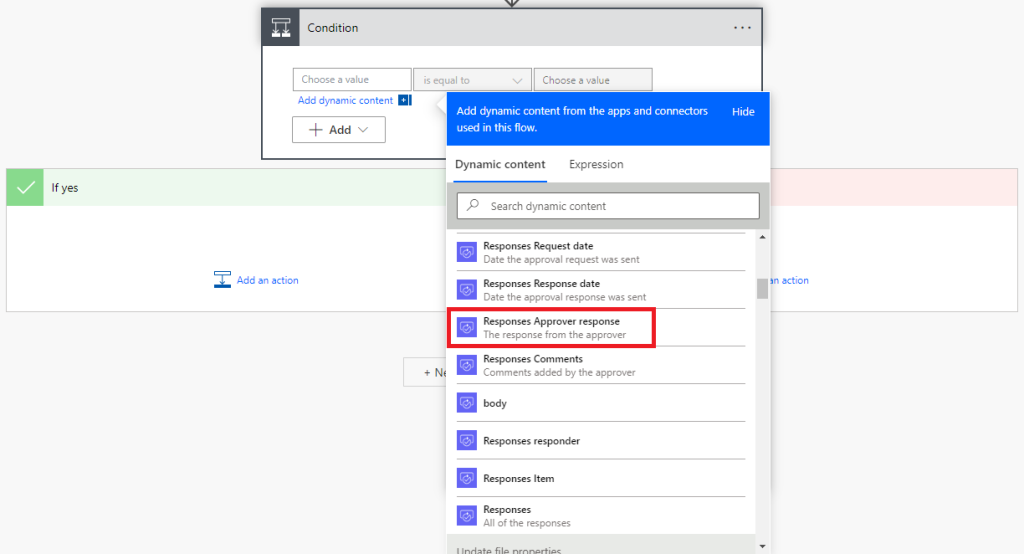
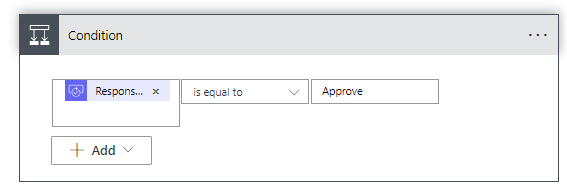
Add an action called “Condition”, in the Condition’s left-hand side we would add the “Responses Approver response” property. Note that this gets added inside a “Apply” to each action. Add “Approve” to the right side, so we would be comparing the Approver’s response with the string “Approve”,
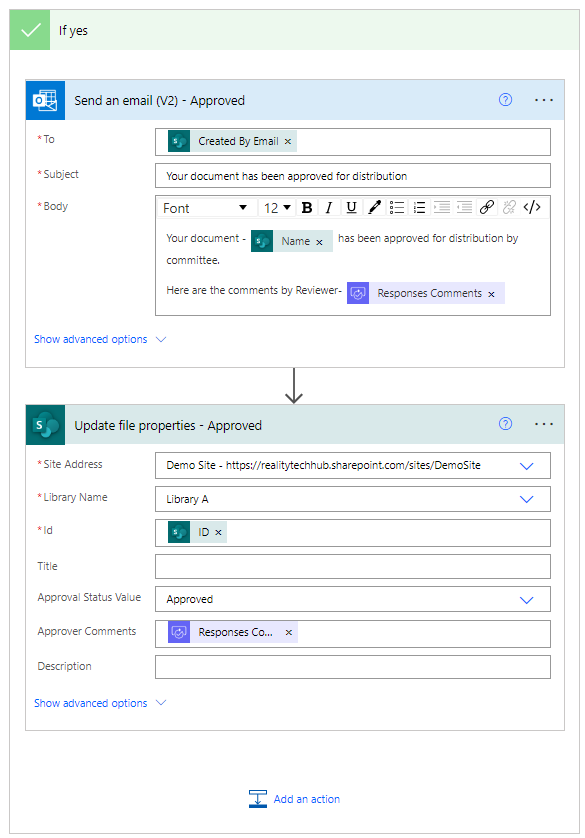
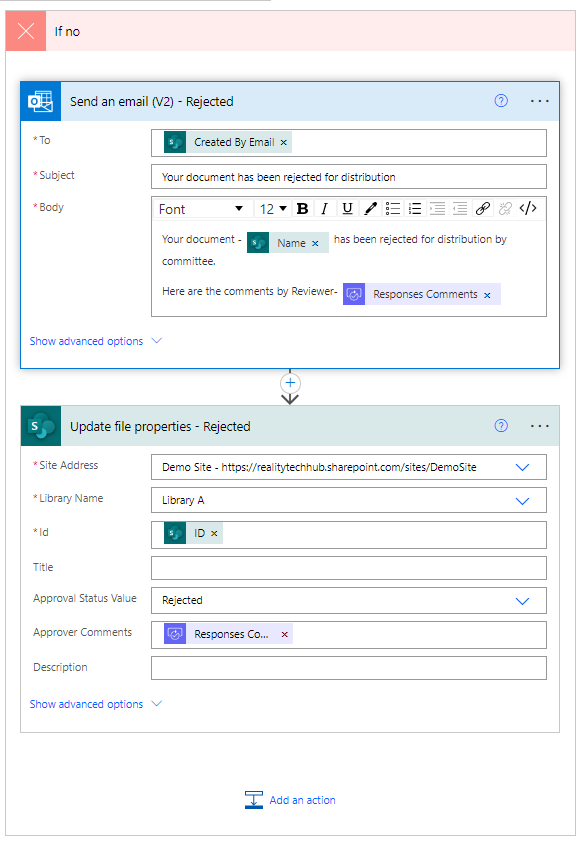
5. Based on the condition and needs, add the following actions to send the email to the Submitter and update the Approval Status of the document as needed for this particular approval workflow.
Here is how the flow looks:
Now let’s upload a document and check how the Flow is working:
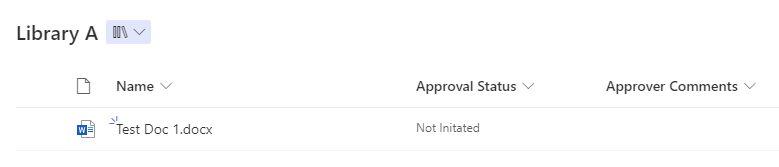
The initial Approval Status is set to “Not Initiated”. When the flow actually starts, it then changes to “In Progress”

Here’s the Approval notification-
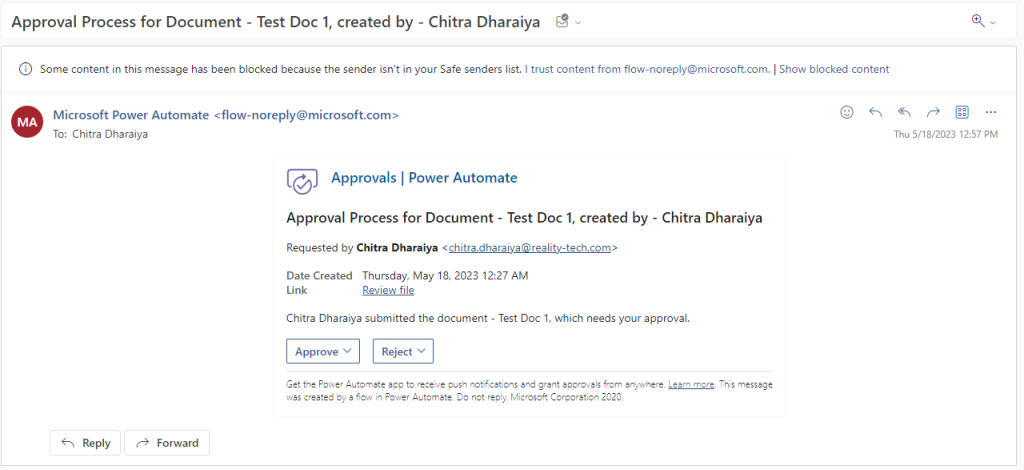
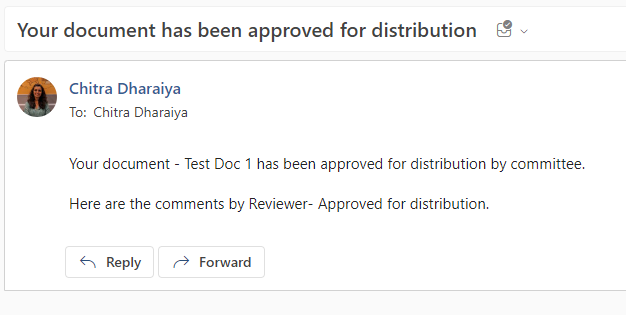
The Reviewer would provide a response – Approve/Reject. This approval status gets updated within the Document Library and an email is sent to the submitter of the document,

Here is how the document then appears within the Document Library,

As we have done above, you can create similar Approval Flows for managing content approval before publishing/distributing documents.
Lastly, you can add further customizations that are based on the Approval Status, to the row or the column itself within the library.
(Note: Is this article not meeting your expectations? Do you have knowledge or insights to share? Unlock new opportunities and expand your reach by joining our authors team. Click Registration to join us and share your expertise with our readers.)