Introduction
A weed eater is an essential tool for anyone who needs to maintain their lawn or garden. It’s a powerful tool that can help you keep your lawn or garden looking its best. But sometimes, you may need to take off the weed eater head in order to make repairs or replace it. This guide will provide step-by-step instructions on how to safely take off a weed eater head.
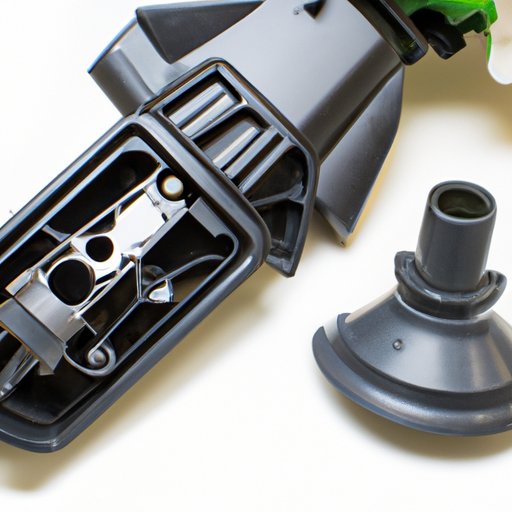
Step-by-Step Instructions for Removing a Weed Eater Head
The first step to removing a weed eater head is to make sure you unplug the weed eater. This will ensure that you don’t get shocked or injured while working on the head. Once you have unplugged the weed eater, locate the screws or bolts that are holding the head in place. Most weed eaters will have either two or four screws or bolts that need to be removed.
Once you have located the screws or bolts, use the appropriate screwdriver or wrench to remove them. Be careful not to strip the screws or bolts as you are removing them. After all of the screws or bolts have been removed, carefully pull the head away from the shaft. Be careful not to damage the shaft as you are pulling the head away.

How to Quickly and Easily Change Your Weed Eater Head
Once you have taken off the weed eater head, you can choose the right replacement head for your weed eater. Make sure to choose a head that is compatible with your model of weed eater. You may also want to consider the type of job you will be using the weed eater for, as some heads are better suited for certain tasks than others.
Once you have chosen the right replacement head, attach it to the shaft of the weed eater. Make sure to line up the holes in the head with the holes in the shaft. Then, secure the head with the screws or bolts that were previously removed. Make sure that the screws or bolts are tight and secure, but don’t over-tighten them as this could cause damage to the head.

DIY Weed Eater Maintenance: How to Remove the Head
If you want to do some DIY maintenance on your weed eater, you may need to take off the head in order to access the internal components. Before you start, make sure to wear protective gear such as gloves and safety glasses. Then, disconnect the power source and locate the screws or bolts that are holding the head in place.
Once the screws or bolts have been removed, carefully pull the head away from the shaft. Then, clean and inspect the head for any damage. If there is any damage, you may need to replace the head. Otherwise, you can lubricate any moving parts and reattach the head. Make sure to secure the head with the screws or bolts and don’t forget to reconnect the power source before you start using the weed eater again.
Taking Off the Weed Eater Head Like a Pro
When taking off the weed eater head, it is important to follow safety precautions. Make sure to wear protective gear such as gloves and safety glasses. Also, be aware of any potential hazards such as exposed wires or sharp edges. Finally, always follow the manufacturer’s instructions when taking off the weed eater head.

Expert Tips for Removing a Weed Eater Head
Experts recommend making sure you have the right tools before attempting to take off the weed eater head. The right tools can make the job much easier and safer. Additionally, make sure to not use too much force when removing the screws or bolts. Finally, keep the area clean while you are working so that you don’t accidentally damage the weed eater head.
A Guide to Safely Removing a Weed Eater Head
To safely take off a weed eater head, make sure to wear protective gear such as gloves and safety glasses. Disconnect the power source before beginning work, and make sure you have the right tools. Follow the manufacturer’s instructions for taking off the head and take your time. When you are finished, make sure to put everything back together correctly before turning the power back on.
Conclusion
Taking off a weed eater head is a simple process that anyone can do. With the right tools and knowledge, you can quickly and easily take off the weed eater head and replace it if necessary. Just remember to always follow safety precautions and manufacturer’s instructions. With these tips, you can take off your weed eater head like a pro.
(Note: Is this article not meeting your expectations? Do you have knowledge or insights to share? Unlock new opportunities and expand your reach by joining our authors team. Click Registration to join us and share your expertise with our readers.)