Introduction
A solar car is a vehicle that uses solar cells to convert sunlight into electricity, which powers an electric motor. Solar cars have many benefits and are a popular project for DIY enthusiasts who want to build an eco-friendly car at home. In this article, we will explore the basics of building a solar car, including the materials and tools required, the step-by-step process of building the chassis, installing the electric motor, and adding solar panels.
Basics of Building a Solar Car
Building a solar car requires several basic components, including an electric motor, batteries, solar panels, and a controller. The solar panels power the motor, and the batteries store energy for later use. A solar car can reach speeds of up to 50 mph and has a range of 200 miles or more on a single charge.
Solar power has many applications, including transportation, and has several benefits over traditional fossil fuels. Solar cars do not emit harmful pollutants, are quiet, and have lower operating costs.
Collect Materials and Tools
The materials and tools required for building a solar car vary depending on the design and size of the car. Before starting the project, it is essential to create a comprehensive list of all the required materials and tools. The materials commonly used for building a solar car include PVC pipes, wood, aluminum sheets, and fiberglass. The tools required include a jigsaw, saw, drill, screwdriver, and wrench, among others.
Using the right tools and materials is critical for building a robust and durable solar car. Choosing the appropriate materials and tools ensures that the car is lightweight, yet sturdy enough to support the motor and solar panels.
Building the Chassis
The first step in building a solar car is creating the chassis or frame of the car. The chassis holds the motor, battery, and solar panels. The most commonly used materials for building the chassis are PVC pipes, wood, and aluminum sheets. To create the frame, measure and cut the materials to the desired length and shape. Once the frame is complete, join the pieces using recommended joining techniques such as welding, gluing, or bolts and nuts.
Installing the Electric Motor
The next step is installing the electric motor. The motor should be installed in the center of the car to ensure weight distribution and stability. Once the motor is installed, connect the wires to the controller and test the motor to ensure it is working correctly. The controller regulates the speed of the car and ensures that the motor receives the correct amount of voltage and current. Choosing the right electric motor is crucial and largely depends on the size and weight of the car.
Maintaining the electric motor is also important to ensure that it lasts long and operates efficiently. Regularly cleaning the motor and lubricating all moving parts can help extend its lifespan.
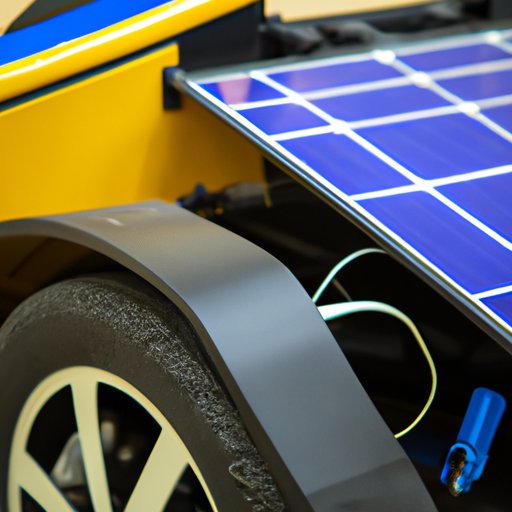
Adding Solar Panels
Solar panels are essential components of a solar car. The solar panels convert sunlight into electricity, which powers the electric motor. It is crucial to position the solar panels in a place where they can receive maximum sunlight exposure, such as on the roof of the car.
When installing the solar panels, it is important to ensure that they are connected correctly to the battery. The battery stores energy from the solar panels for later use, especially during periods of low sunlight. To optimize the placement of the solar panels, consider using a sun tracker that follows the sun’s path and keeps the panels perpendicular to the sun’s rays.
Making it Run
The final step is connecting the battery to the electric motor. Once all the components are assembled, test the car to ensure that it is working correctly. The motor should operate smoothly, and the solar panels should be charging the battery. Troubleshoot any issues that arise, such as poor motor performance or low battery charge.
Testing in Real-World Conditions
After building the solar car, it is essential to test it in real-world conditions safely. Testing the car on a quiet road or a parking lot is recommended to ensure that it works correctly. Measure the car’s speed and range to analyze the performance and identify any areas that need improvement. Testing the car in different environments, such as hills or slopes, can help to identify how the car performs in different situations.
Conclusion
Building a solar car is an exciting DIY project with many benefits. By following the above steps, you can build an eco-friendly car that uses solar energy to power its electric motor. Experimenting with different designs and materials can also lead to new and innovative ways to build a solar car. Solar cars are environmentally-friendly, quiet, and have lower operating costs, making them an appealing alternative to traditional cars that rely on fossil fuels. By building and driving a solar car, you are contributing to a cleaner and healthier environment.
(Note: Is this article not meeting your expectations? Do you have knowledge or insights to share? Unlock new opportunities and expand your reach by joining our authors team. Click Registration to join us and share your expertise with our readers.)