Introduction
If you own a travel trailer, you know how important it is to keep it stable and secure while driving. One way to do this is to install sway bars. Sway bars are designed to reduce the amount of lateral movement when towing, which can help prevent accidents, damage to the trailer, and other issues. In this article, we’ll discuss what sway bars are, why they’re important, and provide a step-by-step guide on how to install them on your travel trailer.
What are Sway Bars and Why Do You Need Them?
Sway bars, also known as anti-sway bars or stabilizer bars, are devices that are attached to the hitch of a travel trailer. They’re designed to reduce the amount of lateral movement when towing, which can help prevent accidents, damage to the trailer, and other issues. Without sway bars, the trailer will move from side to side, which can cause instability and even lead to an accident. Installing sway bars can help keep the trailer stable and secure while driving.
Benefits of Installing Sway Bars on a Travel Trailer
There are many benefits to installing sway bars on your travel trailer, including:
- Improved safety by reducing the amount of lateral movement when towing
- Reduced stress on the trailer and its components
- Improved handling and stability when driving
- Increased fuel efficiency due to reduced drag
Step-by-Step Guide to Installing Sway Bars on a Travel Trailer
Installing sway bars on a travel trailer is not a difficult task, but it does require some patience and attention to detail. Here’s a step-by-step guide to help you get started:
Gather Necessary Tools and Supplies
Before you begin, make sure you have all the necessary tools and supplies. You’ll need a wrench set, socket set, hex key set, drill with appropriate bits, tape measure, marker or pencil, safety glasses, ratchet straps, and the sway bar itself.
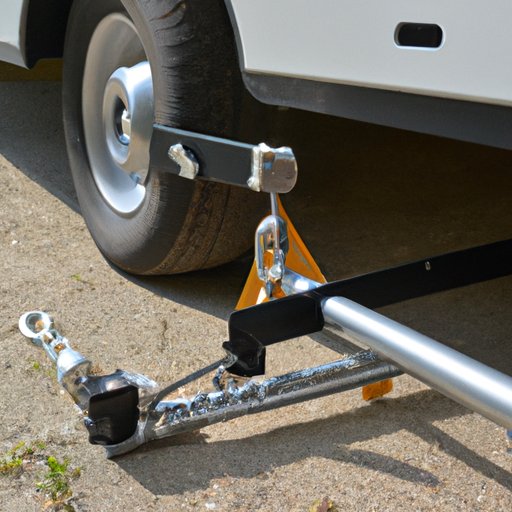
Prepare the Trailer
Once you have all the necessary tools and supplies, you can start preparing the trailer for the installation. Start by parking the trailer on a level surface. Then, remove any obstructions from the hitch area so you have enough room to work. Make sure the hitch is securely attached to the trailer frame.
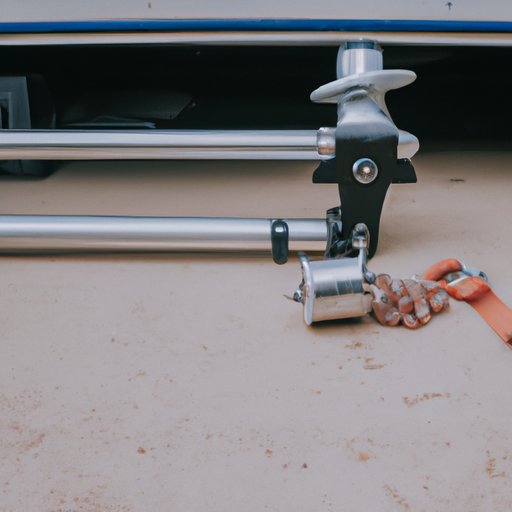
Install the Sway Bar
Now it’s time to install the sway bar. Place the sway bar in the hitch area and attach the brackets to the trailer frame. Use the appropriate bolts and nuts to secure the brackets. Once the brackets are in place, attach the sway bar to the brackets with the provided hardware. Make sure the bar is securely fastened.
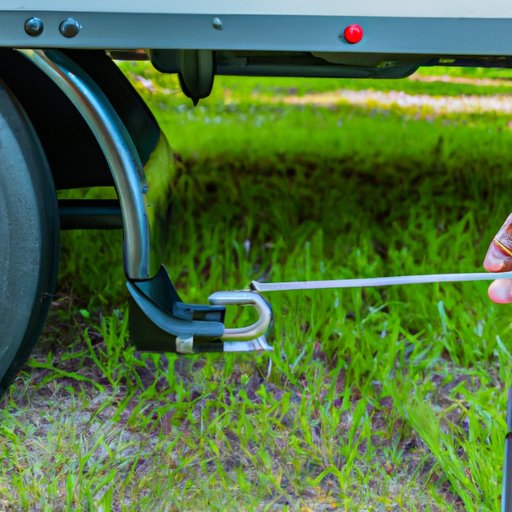
Test the Installation
Once the sway bar is installed, it’s important to test the installation to make sure it’s secure and functioning properly. Start by jacking up one side of the trailer and checking that the sway bar is securely attached. If everything looks good, lower the trailer and take it for a test drive. Make sure the sway bar is working properly and that the trailer is stable and secure.
DIY Installation of Sway Bars for Travel Trailers
If you’re comfortable with basic DIY projects and have the necessary tools and supplies, you may want to consider doing a DIY installation of sway bars for your travel trailer. Here are some things to keep in mind when doing a DIY installation:
Considerations When Doing a DIY Installation
- Make sure the trailer is parked on a level surface before starting the installation.
- Check the hitch to make sure it is securely attached to the trailer frame.
- Make sure the bolts and nuts used to secure the brackets are tight.
- Take the trailer for a test drive after the installation is complete to make sure the sway bar is working properly.
Detailed Steps for Installing the Sway Bar
- Park the trailer on a level surface and remove any obstructions from the hitch area.
- Place the sway bar in the hitch area and attach the brackets to the trailer frame using the appropriate bolts and nuts.
- Attach the sway bar to the brackets with the provided hardware.
- Jack up one side of the trailer and check that the sway bar is securely attached.
- Lower the trailer and take it for a test drive to make sure the sway bar is working properly.
Tips and Tricks for Installing Sway Bars on a Travel Trailer
Here are some tips and tricks to help make the installation process easier:
- Use a drill bit that is appropriate for the hitch. The wrong size bit can strip the threads, which can make the installation more difficult.
- Check the torque on the bolts after installing. Over-tightening can damage the threads, so make sure you use the correct torque for the bolts.
A Beginner’s Guide to Installing Sway Bars on a Travel Trailer
If you’re a beginner, there are a few extra considerations to keep in mind when installing sway bars on your travel trailer. Here’s what you should know before getting started:
Identify the Type of Hitch Used on the Trailer
The type of hitch used on the trailer will determine the type of sway bar you need. Make sure you identify the type of hitch before purchasing a sway bar so you get the right one.
Determine the Correct Size Sway Bar for Your Trailer
Once you’ve identified the type of hitch, you need to determine the correct size sway bar for your trailer. Most sway bars come in various sizes, so make sure you get one that is appropriate for your trailer.
Measure Twice, Cut Once
When drilling holes for the brackets, it’s important to measure twice and cut once. Taking the time to ensure the holes are drilled in the right spot will save you time and frustration in the long run.
Essential Tools and Supplies Needed for Installing Sway Bars on a Travel Trailer
In addition to the sway bar itself, here are some of the essential tools and supplies you’ll need to install sway bars on your travel trailer:
- Wrench set
- Socket set
- Hex key set
- Drill with appropriate bits
- Tape measure
- Marker or pencil
- Safety glasses
- Ratchet straps
Conclusion
Installing sway bars on a travel trailer is an important step in keeping your trailer safe and secure. By following the steps outlined in this article, you can easily install sway bars on your trailer. Make sure you have the necessary tools and supplies, prepare the trailer, and test the installation to ensure it is secure and functioning properly. With a little patience and attention to detail, you’ll be able to install sway bars on your travel trailer in no time.
By installing sway bars, you’ll enjoy improved safety, reduced stress on the trailer and its components, improved handling and stability, and increased fuel efficiency. So if you’re looking for a way to keep your travel trailer safe and secure, installing sway bars is a great option.
(Note: Is this article not meeting your expectations? Do you have knowledge or insights to share? Unlock new opportunities and expand your reach by joining our authors team. Click Registration to join us and share your expertise with our readers.)
Steps to install a caravan stabilizer bar. Step #1: Install the hitch sway control ball. Step #2 – Mark the location of the trailer’s wobble ball holes. Step #3: Drill pilot holes in the frame. Step #4: Secure the trailer swing ball in place.Step #5: Attach the Stabilizer Unit.