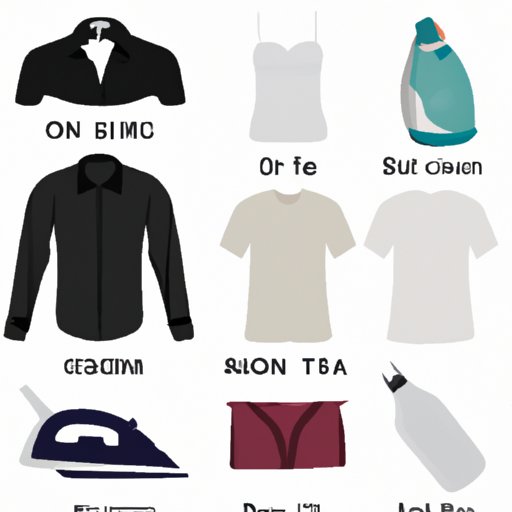
Introduction
Have you ever bought a shirt only to find it’s too large and baggy once you try it on? This is a common problem that can be frustrating, especially if you don’t want to go through the hassle of returning it or exchanging it for a smaller size. Fortunately, there are several ways to shrink a too-large shirt without ruining it. In this article, we will explore eight different solutions that you can try.

Using a Hot Iron and Steam
The first method of shrinking a shirt uses a hot iron and steam. This is probably the quickest and safest way to shrink a shirt, and it’s also one of the most effective. Here are the steps to follow:
Preparation: Setting the Iron to the Right Temperature
Before you start, make sure your iron is set to the highest setting that is safe for your fabric. If you’re not sure what temperature to use, check the care label on the shirt or consult a professional dry cleaner. Once your iron is set to the right temperature, plug it in and let it heat up.
Ironing the Shirt with Steam
Now it’s time to start ironing the shirt. Start by laying it out flat on a hard surface. Make sure you have plenty of space around the shirt so you can move the iron freely. Begin ironing the shirt, paying special attention to the seams and any areas that need extra shrinking. When you’re finished, turn the iron to the “steam” setting and hold it over the shirt for a few seconds. The steam will help to further shrink the fabric.
Finishing Touches
Once you’re done ironing and steaming the shirt, let it cool down before you touch it. Then, lay it out flat to ensure that it has kept its shape. If necessary, give it another pass with the iron to make sure all the wrinkles are gone. Finally, hang the shirt up so it can air dry completely.
Shrinking with Hot Water
Another way to shrink a shirt is by soaking it in hot water. This is a great option if you don’t have access to an iron or if the fabric of your shirt is too delicate for ironing. Here’s how to do it:
Preparing the Shirt
First, fill a sink or bucket with hot water. The temperature should be as hot as you can comfortably handle. Then, add a capful of laundry detergent and mix it into the water. Finally, submerge the shirt in the water and let it soak for at least 15 minutes.
Soaking the Shirt in Hot Water
Once the shirt has soaked for at least 15 minutes, take it out and gently squeeze out the excess water. Be careful not to wring the fabric too much, as this could cause it to tear. Then, place the shirt on a clean towel and roll it up to get rid of any additional moisture.
Drying the Shirt
Once the shirt is no longer wet, hang it up to air dry. You can also put it in the dryer on the lowest heat setting if you want to speed up the process. However, make sure you check the care label on the shirt to make sure it’s safe to put it in the dryer.
Boiling the Shirt in a Pot
If you’re feeling adventurous, you can also try boiling the shirt in a pot. This is a more drastic approach to shrinking a shirt, so be sure to proceed with caution. Here’s how to do it:
Preparing the Shirt
Start by filling a large pot with enough water to cover the shirt. Then, add a capful of laundry detergent and bring the water to a boil. Once the water is boiling, carefully place the shirt in the pot and let it simmer for 10 to 15 minutes.
Boiling the Shirt
When the shirt has simmered for 10 to 15 minutes, carefully remove it from the pot and place it on a clean towel. Let it cool for a few minutes before handling it. Once it’s cool enough to touch, gently squeeze out the excess water and then lay it out flat.
Drying the Shirt
Finally, hang the shirt up to air dry or put it in the dryer on the lowest heat setting. Again, make sure you check the care label on the shirt before putting it in the dryer.

Washing the Shirt in Hot Water
Another simple way to shrink a shirt is to wash it in hot water. This is a great option if you don’t have access to an iron or boiling water. Here’s how to do it:
Preparing the Shirt
Start by filling the washing machine with hot water. Make sure the water is as hot as you can comfortably handle. Then, add a capful of laundry detergent and close the lid. Before adding the shirt, double-check the care label to make sure it’s safe to wash it in hot water.
Washing the Shirt
Once you’ve checked the care label, add the shirt to the washer and let it run through a full cycle. After the cycle is complete, remove the shirt from the washer and place it on a clean towel. Gently squeeze out the excess water and then lay it out flat.
Drying the Shirt
Finally, hang the shirt up to air dry or put it in the dryer on the lowest heat setting. Again, make sure you check the care label before putting it in the dryer.

Drying the Shirt in the Dryer
The last method of shrinking a shirt is by drying it in the dryer. This is a great option if you want to speed up the process and don’t mind taking a risk. Here’s how to do it:
Preparing the Shirt
Start by checking the care label on the shirt to make sure it’s safe to put it in the dryer. If it is, then place the shirt in the dryer and close the door.
Selecting the Right Dryer Setting
Next, select the hottest setting on the dryer. This is usually labeled “high” or “extra hot.” Make sure you don’t select a setting that is too hot, as this could damage the fabric of the shirt. Once you’ve selected the right setting, start the dryer and let it run for 15 to 20 minutes.
Drying the Shirt
After the shirt has been in the dryer for 15 to 20 minutes, take it out and lay it out flat. If it’s still too large, put it back in the dryer for a few more minutes. Once it’s the right size, hang it up to air dry completely.
Using Hair Conditioner to Shrink the Shirt
Another unique way to shrink a shirt is by using hair conditioner. This is a great option if you don’t have access to an iron or boiling water. Here’s how to do it:
Preparing the Shirt
Start by filling the sink or bathtub with warm water. Then, add a generous amount of hair conditioner and mix it into the water. Finally, submerge the shirt in the water and let it soak for at least 15 minutes.
Applying the Hair Conditioner
When the shirt has soaked for at least 15 minutes, take it out and gently squeeze out the excess water. Be careful not to wring the fabric too much, as this could cause it to tear. Next, apply a generous amount of conditioner to the shirt and work it into the fabric. Then, leave the shirt to sit for 10 to 15 minutes.
Drying the Shirt
Once the shirt has sat for 10 to 15 minutes, rinse it off in cold water and then hang it up to air dry. Alternatively, you can put it in the dryer on the lowest heat setting. Just make sure you check the care label on the shirt before putting it in the dryer.
Conclusion
Shrinking a too-large shirt doesn’t have to be a difficult task. With the right tools and techniques, you can easily shrink a shirt to fit you perfectly. From using a hot iron and steam to boiling it in a pot, there are plenty of options to choose from. Ultimately, it’s up to you to decide which method works best for you and your fabric.
Summary of Solutions
In summary, here are eight different solutions for shrinking a shirt:
- Using a hot iron and steam
- Shrinking with hot water
- Boiling the shirt in a pot
- Washing the shirt in hot water
- Drying the shirt in the dryer
- Using hair conditioner to shrink the shirt
Final Tips
When shrinking a shirt, always make sure you read the care label and follow the instructions. Also, remember to keep an eye on the fabric to prevent it from shrinking too much. And finally, when in doubt, consult a professional dry cleaner for advice.
(Note: Is this article not meeting your expectations? Do you have knowledge or insights to share? Unlock new opportunities and expand your reach by joining our authors team. Click Registration to join us and share your expertise with our readers.)