Introduction
Face masks have become an essential part of our daily lives in the wake of the COVID-19 pandemic. Wearing a face mask is one of the most effective ways to protect yourself and others from airborne particles and germs. If you’re looking for a way to make your own face mask, you’ve come to the right place! In this article, we’ll walk you through the steps of making a face mask, from gathering materials to testing the fit. We’ll also discuss the best materials for making a face mask, what features to look for, and tips for creating an effective face mask. Plus, we’ll provide some creative ideas for decorating your homemade mask. Let’s get started!
Step-by-Step Guide to Making a Face Mask
Making a face mask at home is a simple process that requires minimal materials and supplies. Here’s a step-by-step guide to help you get started:
1. Gather necessary materials. You’ll need fabric, thread, elastic or ties, scissors, and a sewing machine (or needle and thread).
2. Prepare the materials for making the face mask. Cut the fabric into two pieces, each measuring 8 inches by 11 inches. Cut four pieces of elastic or ties, each measuring 12 inches long. If you’re using thread, cut a 20-inch piece.
3. Sew or assemble the face mask. Place the two pieces of fabric together with the wrong sides facing out. Sew the top and bottom edges together, leaving a 1/4-inch seam allowance. Turn the fabric inside out so the right side is facing out. Sew the two side edges together, again leaving a 1/4-inch seam allowance. Attach the elastic or ties to the corners of the mask. If you’re using thread, tie the ends of the thread around the elastic or ties.
4. Test and adjust the fit of the face mask. Put on the face mask and adjust the fit as needed. The mask should cover both your nose and mouth and fit snugly against the sides of your face. If the mask feels too loose, you can sew or knot the elastic or ties for a tighter fit.

DIY Face Mask Tutorial: How to Make Your Own Mask at Home
Now that you know the basic steps for making a face mask, let’s dive deeper into the process. Here’s a DIY face mask tutorial to help you create your own mask at home:
What tools are needed? To make a face mask, you’ll need fabric, thread, scissors, and either elastic or ties. You’ll also need a sewing machine (or needle and thread) to put it all together.
How to make a pattern for the face mask. To make a pattern for the face mask, trace a 9-inch by 6-inch rectangle onto a piece of paper. Cut the rectangle out and use it as a template to cut two pieces of fabric.
How to cut the fabric. After tracing the pattern onto the fabric, cut out two pieces. Each piece should measure 8 inches by 11 inches.
How to sew the face mask. Place the two pieces of fabric together with the wrong sides facing out. Sew the top and bottom edges together, leaving a 1/4-inch seam allowance. Turn the fabric inside out so the right side is facing out. Sew the two side edges together, again leaving a 1/4-inch seam allowance. Attach the elastic or ties to the corners of the mask.
How to attach elastic or ties. If you’re using elastic, attach one end of the elastic to the corner of the mask and sew it in place. Repeat with the other three corners. If you’re using ties, loop one end of the tie around the corner of the mask and secure it with a knot. Repeat with the other three corners.
How to test the fit of the face mask. Put on the face mask and adjust the fit as needed. The mask should cover both your nose and mouth and fit snugly against the sides of your face. If the mask feels too loose, you can sew or knot the elastic or ties for a tighter fit.
The Best Materials for Making a Face Mask
When it comes to choosing materials for your face mask, there are several options available. Here are some of the best materials for making a face mask:
Cotton fabrics. Cotton is a popular choice for face masks because it’s lightweight, breathable, and comfortable. It’s also relatively easy to find and inexpensive.
Non-woven fabrics. Non-woven fabrics, such as polypropylene, are another option for face masks. They’re more dense than cotton fabrics and provide better protection against airborne particles.
Filter materials. If you want extra protection, you can add a filter material to your face mask. Filter materials, such as HEPA filters, can help block small particles from entering the airways.

What You Need to Know About Making Your Own Face Mask
Before you start making your own face mask, there are a few things you should know. Here’s what you need to consider when making your own face mask:
What type of face mask is best for your needs? Not all face masks are created equal. When choosing a face mask, consider the level of protection you need. For example, medical-grade face masks offer the highest level of protection, while cloth face masks provide less protection but are still effective.
What features should you look for in a face mask? Look for face masks that are made of breathable, moisture-wicking materials and feature adjustable straps for added comfort. Also, make sure the face mask fits snugly against your face.
What kinds of materials are best for making a face mask? As mentioned above, cotton, non-woven fabrics, and filter materials are all good options for making a face mask. Choose the material that best meets your needs.
Tips for Creating an Effective Face Mask
Creating an effective face mask is key to ensuring your safety and the safety of those around you. Here are some tips for creating an effective face mask:
Choose the right size for your face. Make sure the face mask fits snugly against your face. You don’t want gaps or openings that allow airborne particles to enter.
Use multiple layers of fabric for better protection. Using two or more layers of fabric can provide better protection against airborne particles.
Ensure the mask fits snugly on your face. Adjust the straps or elastic as needed to ensure a snug fit. You don’t want the mask to be too loose or too tight.
Make sure the mask covers both your nose and mouth. This is essential for protecting yourself from airborne particles.

The Benefits of Wearing a Face Mask
Wearing a face mask has numerous benefits, including the following:
Protects you from airborne particles. Face masks can help protect you from airborne particles, such as dust, pollen, and germs.
Reduces the spread of germs. Wearing a face mask can reduce the spread of germs from person to person.
Helps prevent transmission of infectious diseases. Wearing a face mask can help prevent the transmission of infectious diseases, such as the flu and common cold.
Allows you to maintain physical distance. Face masks can help you maintain physical distance from other people, reducing the risk of transmitting germs.
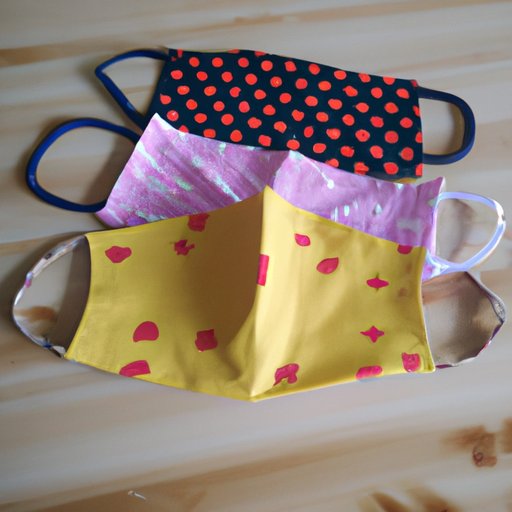
Creative Ideas for Decorating Your Face Mask
Making your own face mask is an opportunity to be creative and express your personal style. Here are some creative ideas for decorating your face mask:
Embroidery. Embroidery is a great way to add a unique touch to your face mask. You can use embroidery floss or yarn to create designs or words on your face mask.
Paint or fabric markers. Paint or fabric markers are a fun way to decorate your face mask. Use them to draw designs or write inspirational phrases.
Sequins and beads. Add sparkle to your face mask with sequins and beads. You can glue them onto the fabric or sew them on for a more permanent design.
Ribbons and trims. Ribbons and trims can add a stylish touch to your face mask. Use them to trim the edges of the mask or create decorative patterns.
Conclusion
Making your own face mask is a great way to protect yourself and others from airborne particles and germs. With the right materials and supplies, you can easily create your own face mask at home. Plus, you can get creative and decorate your face mask with embroidery, paint, sequins, and more. Now that you know how to make a face mask and the benefits of wearing one, it’s time to start crafting!
(Note: Is this article not meeting your expectations? Do you have knowledge or insights to share? Unlock new opportunities and expand your reach by joining our authors team. Click Registration to join us and share your expertise with our readers.)