Introduction
The weed eater is a versatile tool that can be used in a variety of landscaping tasks. It is important to properly wind the weed eater so that it will run efficiently and last longer. This article will provide an overview of the steps involved in winding a weed eater and offer tips and tricks for getting the job done correctly.
Step-by-Step Guide to Winding a Weed Eater
Winding a weed eater is a relatively simple task that can be completed with minimal tools and materials. The following steps will walk you through the process of winding a weed eater.
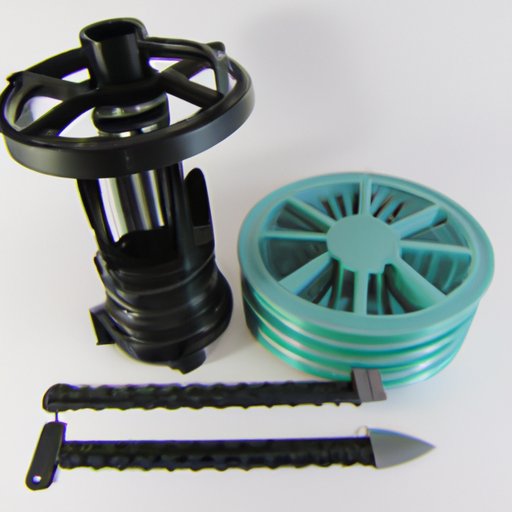
Step 1: Gather Materials
Before beginning the process of winding a weed eater, make sure to gather all necessary materials. You will need the following items: a new spool of string, scissors, a Phillips head screwdriver, and any other parts necessary for your particular model of weed eater.
Step 2: Prepare the Line
Once you have gathered the necessary materials, it is time to prepare the line. Cut the line to the desired length, taking into account the size of the spool and the type of line being used. Make sure to leave enough extra line to wrap around the spool at least three times.
Step 3: Load the Spool
The next step is to load the spool. Carefully remove the cover from the spool and insert the line into the hole in the center of the spool. Make sure to feed the line through the eyelet on the side of the spool.
Step 4: Wrap the Line Around the Spool
Once the line has been loaded onto the spool, it is time to start wrapping the line around the spool. Start by wrapping the line around the spool in a counter-clockwise direction, making sure to keep each wrap tight against the previous one. Continue until the entire length of the line has been wrapped around the spool.
Step 5: Secure the Line on the Spool
Once the line has been wrapped around the spool, it is important to secure it in place. Most spools come with a small hole in the center that can be used to tie the end of the line in place. If not, you may need to use a Phillips head screwdriver to secure the line in place.
Step 6: Trim the Line
The final step is to trim the line. Using scissors or a knife, trim off any excess line that is sticking out beyond the outer edge of the spool. Make sure to leave at least half an inch of line extending beyond the spool so that it will fit snugly in the weed eater.
Tips and Tricks for Winding a Weed Eater
The following tips and tricks will help ensure that your weed eater is properly wound and running efficiently:
- Use the right type of string. Different types of weed eaters require different types of line. Make sure to check the manual for your particular model to determine which type of line is best for your weed eater.
- Measure the line length. Make sure to measure the line to the correct length before cutting and loading it onto the spool. Too much line can cause the weed eater to become tangled, while too little line will limit its effectiveness.
- Follow directions carefully. Make sure to follow the manufacturer’s instructions for winding the weed eater. Failing to do so can result in damage to the weed eater and/or injury to the user.
Winding a Weed Eater: A Beginner’s Guide
For those who are new to winding a weed eater, the following information will provide an overview of the tools and techniques needed to get the job done correctly.
What Tools are Needed?
In order to wind a weed eater, you will need the following tools: a new spool of line, scissors, a Phillips head screwdriver, and any other parts necessary for your particular model of weed eater.
How to Choose the Right Line
When selecting the line for your weed eater, make sure to choose the right type for your particular model. Different types of weed eaters require different types of line. Check the manual for your particular model to determine which type of line is best for your weed eater.
Understanding the Different Types of Weed Eaters
In addition to choosing the right type of line, it is also important to understand the different types of weed eaters. There are two main types of weed eaters: gas-powered and electric. Each type requires a different type of line, so make sure to select the line that is designed for your particular model of weed eater.

The Basics of Winding a Weed Eater
Now that you know the basics of choosing the right line and understanding the different types of weed eaters, it is time to learn the proper technique for winding a weed eater. The following steps will walk you through the process of replacing the line on a weed eater.
Knowing How to Replace the Line
Replacing the line on a weed eater is a relatively simple task. First, gather the necessary materials, such as a new spool of line and any additional parts required for your particular model. Once the materials are gathered, measure the line to the desired length and cut it. Then, load the line onto the spool, wrap it around the spool in a counter-clockwise direction, and secure it in place.
Understanding the Proper Technique
It is important to understand the proper technique for winding a weed eater. Start by feeding the line through the eyelet on the side of the spool and wrapping it around the spool in a counter-clockwise direction. Make sure to keep each wrap tight against the previous one and to secure the line in place before trimming off any excess line.
Troubleshooting Common Problems
If you encounter any problems while winding a weed eater, there are a few troubleshooting tips that can help. Make sure to check the manual for your particular model to ensure that you are using the correct type of line and following the instructions correctly. Additionally, make sure that the line is securely tied in place before trimming off any excess.

How to Properly Wind a Weed Eater for Maximum Efficiency
Finally, here are a few tips for properly winding a weed eater for maximum efficiency:
- Keep the motor cool. Make sure to allow the motor to cool down between uses to prevent it from overheating.
- Use the right line size. Make sure to use the correct size of line for your particular model of weed eater.
- Clean the spool regularly. Regularly cleaning the spool will help to ensure that the line does not become tangled or damaged.
Conclusion
Winding a weed eater is a relatively simple task that can be completed with minimal tools and materials. Following these steps and tips will ensure that your weed eater is properly wound and running efficiently. With a bit of practice, you should be able to master the art of winding a weed eater in no time.
The benefits of properly winding a weed eater include increased efficiency, improved performance, and a longer lifespan. Taking the time to properly wind a weed eater will help to ensure that your weed eater is up to the task of tackling even the toughest weeds.
In summary, winding a weed eater involves gathering the necessary materials, preparing the line, loading the spool, wrapping the line around the spool, securing the line on the spool, trimming the line, and following essential tips and tricks for maximum efficiency. With the right tools and techniques, anyone can learn how to properly wind a weed eater.
(Note: Is this article not meeting your expectations? Do you have knowledge or insights to share? Unlock new opportunities and expand your reach by joining our authors team. Click Registration to join us and share your expertise with our readers.)