
Introduction
Reflectors are an essential tool for photographers who want to create beautiful lighting in their photos. A reflector is a curved or flat surface used to bounce light back onto a subject or scene, resulting in more even lighting and better contrast. Reflectors come in a variety of shapes, sizes, and colors, and can be used in both artificial and natural light settings. In this article, we will explore how to use reflectors in photography, including different types of reflectors, setting up and positioning reflectors for portraits, creative uses of reflectors, and creating unique lighting effects with reflectors.
Definition of Reflectors
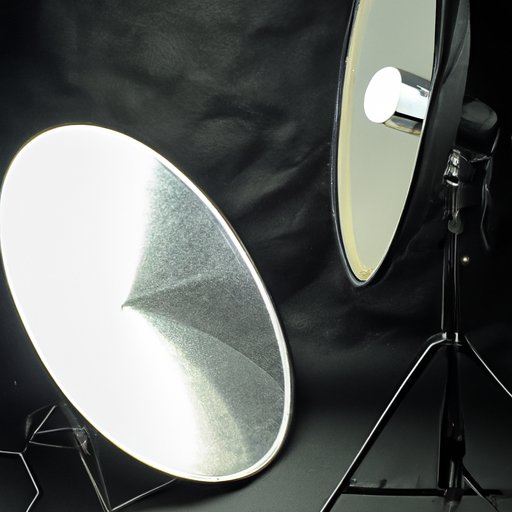
A reflector is any curved or flat surface that reflects light back onto a subject or scene. The most common type of reflector used in photography is a collapsible circular disc made of white fabric stretched over a metal frame. This type of reflector is often referred to as a “disc reflector” or “white reflector”, and it is used to bounce light back onto a subject or scene, resulting in more even lighting and better contrast. Other types of reflectors include silver and gold reflectors, which are used to add warmth to a photograph; black reflectors, which can be used to absorb light and create shadows; and various colored reflectors, which can be used to add color to a photograph.
Overview of Different Types of Reflectors Used in Photography
The most common type of reflector used in photography is the white disc reflector. These reflectors are usually between 5 and 8 feet in diameter and can be easily collapsed for storage and transport. They are often made of a reflective white material such as polyester or vinyl, and have a curved shape that helps to evenly distribute the reflected light. White reflectors are great for bouncing light onto a subject or scene and can be used in both artificial and natural light settings.
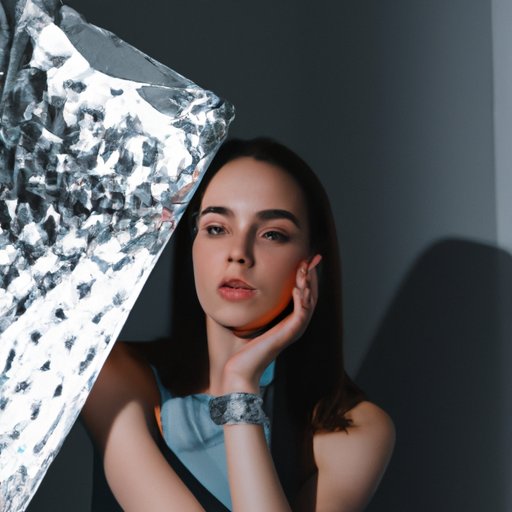
Silver reflectors are also popular in photography, and they are used to add warmth to a photograph. Silver reflectors are usually rectangular or square in shape and are made of a highly reflective silver material such as mylar. Silver reflectors are great for adding subtle warmth to a photo, and they can also be used to fill in harsh shadows caused by direct sunlight.
Gold reflectors are similar to silver reflectors, but they are used to add a warmer, more golden tone to a photograph. Gold reflectors are usually round or oval in shape and are made of a highly reflective gold material such as mylar. Gold reflectors are great for adding a warm, golden glow to a photo, and they can also be used to fill in harsh shadows caused by direct sunlight.
Black reflectors are a great way to create dramatic shadows in a photograph. Black reflectors are usually rectangular or square in shape and are made of a non-reflective black material such as velvet or felt. Black reflectors can be used to absorb light and create dark shadows, adding depth and drama to a photograph.
Colored reflectors are also available, and they can be used to add a splash of color to a photograph. Colored reflectors are usually rectangular or square in shape and are made of a highly reflective material such as mylar. Colored reflectors can be used to add a subtle tint of color to a photograph, and they can also be used to fill in harsh shadows caused by direct sunlight.
Setting Up and Positioning Reflectors for Portraits
When setting up and positioning reflectors for portraits, it is important to consider the size of the reflector, the angle of the reflector, and the distance between the reflector and the subject. For example, a larger reflector will be able to bounce more light onto the subject, while a smaller reflector will be able to bounce less light onto the subject. The angle of the reflector should also be taken into consideration, as a reflector angled towards the subject will bounce more light onto the subject than a reflector angled away from the subject. Lastly, the distance between the reflector and the subject should be taken into consideration, as a reflector placed closer to the subject will be able to bounce more light onto the subject than a reflector placed farther away from the subject.
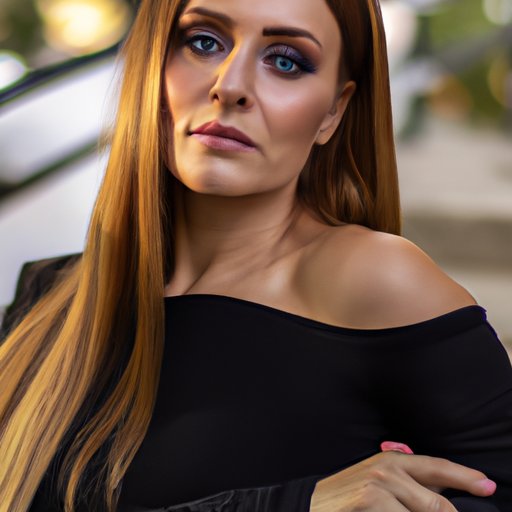
It is also important to note that when using a reflector in a portrait setting, the size and angle of the reflector should be adjusted according to the size and shape of the subject. For example, if the subject is small, a larger reflector should be used to provide more coverage. Additionally, if the subject has a curved shape, such as a pregnant woman, then the reflector should be angled to match the contours of the subject.
Step-by-Step Guide to Setting Up Reflectors
1. Choose the right reflector for your needs. Consider the size, shape, and color of the reflector, as well as the size and shape of the subject.
2. Set up the reflector. Place the reflector at an angle to the subject, and adjust the angle of the reflector until you achieve the desired effect.
3. Adjust the distance between the reflector and the subject. The closer the reflector is to the subject, the more light it will bounce onto the subject.
4. Adjust the position of the reflector. Move the reflector around until you achieve the desired effect.
5. Take the shot. Once you have achieved the desired effect, take the shot.
Tips on Choosing the Right Reflector for Your Needs
When choosing a reflector, it is important to consider the size and shape of the reflector, the type of light you are working with, and the size and shape of the subject. For example, if you are working with natural light, then a white reflector is a great choice, as it will help to evenly distribute the light onto the subject. Additionally, if you are photographing a small subject, then a smaller reflector may be a better option, as it will be easier to maneuver and adjust.
It is also important to consider the color of the reflector. White and silver reflectors are great for bouncing light onto a subject and adding warmth to a photograph, while gold and colored reflectors can be used to add a splash of color to a photograph. Lastly, black reflectors are great for creating dramatic shadows in a photograph.
Creative Uses of Reflectors in Photography
Reflectors can be used in a variety of creative ways in photography. One of the most common uses of reflectors is to bounce light onto a subject or scene, resulting in more even lighting and better contrast. Reflectors can also be used to add warmth to a photograph, fill in harsh shadows caused by direct sunlight, and add a splash of color to a photograph.
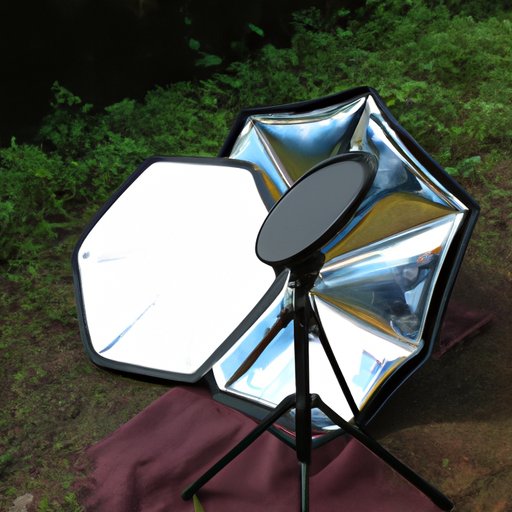
Reflectors can also be used to create unique lighting effects. By positioning the reflector in different ways, you can create interesting patterns of light and shadow, as well as highlight certain areas of a photograph. Additionally, you can use two or more reflectors to create multiple layers of light and shadow, allowing you to create complex and dynamic lighting effects.
Examples of Creative Uses of Reflectors
Reflectors can be used in a variety of creative ways, depending on the situation. Here are a few examples of how reflectors can be used creatively in photography:
• Bouncing light onto a subject or scene to create even lighting and better contrast
• Adding warmth to a photograph by using a silver or gold reflector
• Filling in harsh shadows caused by direct sunlight with a white or colored reflector
• Adding a splash of color to a photograph with a colored reflector
• Creating unique lighting effects by positioning the reflector in different ways
• Creating multiple layers of light and shadow with two or more reflectors
Benefits of Using Reflectors in Natural Light
Using reflectors in natural light is a great way to improve the quality of your photographs. Reflectors can be used to bounce light onto a subject or scene, resulting in more even lighting and better contrast. Additionally, reflectors can be used to fill in harsh shadows caused by direct sunlight, and they can also be used to add warmth or color to a photograph. Finally, reflectors can be used to create unique and interesting lighting effects, allowing you to get creative with your photography.
How to Use Reflectors to Create Unique Lighting Effects
Creating unique lighting effects with reflectors is a great way to add interest and drama to a photograph. To create unique lighting effects with reflectors, start by positioning the reflector in different ways, such as angling it towards the subject or placing it further away from the subject. You can also experiment with positioning multiple reflectors in different ways to create complex and dynamic lighting effects. Additionally, try adding colored gels to the reflector to add a splash of color to the photograph.
Tips for Maximizing the Effectiveness of Reflectors
When using reflectors in photography, it is important to consider the size, shape, and color of the reflector, as well as the size and shape of the subject. Additionally, it is important to adjust the angle and distance of the reflector in order to achieve the desired effect. Finally, experiment with different positions and angles of the reflector in order to create unique and interesting lighting effects.
Conclusion
Reflectors are an essential tool for photographers who want to create beautiful lighting in their photos. There are many different types of reflectors available, including white, silver, gold, black, and colored reflectors. Reflectors can be used to bounce light onto a subject or scene, add warmth or color to a photograph, and create unique lighting effects. When using reflectors, it is important to consider the size, shape, and color of the reflector, as well as the size and shape of the subject, in order to achieve the desired effect. With the right knowledge and practice, anyone can learn how to use reflectors in photography to create beautiful and unique images.
(Note: Is this article not meeting your expectations? Do you have knowledge or insights to share? Unlock new opportunities and expand your reach by joining our authors team. Click Registration to join us and share your expertise with our readers.)