Introduction
Starting seedlings is an exciting way to get a jump start on the growing season. Whether you’re a novice gardener or an experienced green thumb, understanding the fundamentals of seed starting will help ensure success in the garden. In this article, we’ll explore the basics of seed starting, from preparing a soil mix to transplanting seedlings when ready.
Definition of Seed Starting
Seed starting is the process of germinating seeds indoors and then later transplanting them outdoors. This allows gardeners to get a head start on the growing season, as well as ensuring that their plants are better adapted to the local climate and conditions. It also makes it possible to grow rare or hard-to-find varieties that may not be available as plants.
Overview of the Process
The process of seed starting involves five main steps: preparing a soil mix, choosing the right containers, planting seeds at the proper depth, providing adequate light and moisture, and finally, transplanting seedlings when ready. Let’s take a closer look at each of these steps.
Prepare a Soil Mix for Starting Seeds
The first step in seed starting is to prepare a soil mix that is suitable for germinating seeds. The soil mix should be loose and well-draining, with plenty of organic matter. It should also contain the essential nutrients needed by young seedlings such as nitrogen, phosphorus, and potassium.
Selecting Soil
When selecting soil for seed starting, it is best to use a soilless mix. These mixes are specially formulated for seed starting and contain no soil, but rather a blend of peat moss, vermiculite, and perlite. They are also sterile, which helps prevent the spread of disease.
Nutrients Needed
In addition to a soilless mix, it is important to add fertilizer to the soil mix. Choose a fertilizer that is specifically designed for seed starting, such as a balanced 10-10-10 formula. This will provide the necessary nutrients for the seedlings to thrive.
Mixing Instructions
Once you have selected the soil and fertilizer, it is time to mix them together. Begin by combining equal parts of the soilless mix and fertilizer in a large container. Mix them together thoroughly and then moisten the mixture until it is damp throughout. Be careful not to over-water the mix, as this can inhibit germination.

Choose the Right Containers to Start Seeds
The next step in seed starting is to select the right containers for your seedlings. There are many different types of containers available, from small plastic cells to larger pots. The key is to choose containers that are the appropriate size and shape for the type of seedlings you wish to grow.
Types of Containers
When selecting containers for seed starting, it is important to consider the type of seedlings you plan to grow. For example, if you are starting herb or vegetable seedlings, it is best to use smaller containers such as plastic cells or biodegradable pots. If you are starting flowers, you can use larger containers such as plastic pots or even clay pots.
Size and Shape Considerations
It is also important to consider the size and shape of the containers when selecting them for seed starting. Smaller containers are better for smaller seedlings, while larger containers are better for larger seedlings. Additionally, round containers are better for root vegetables, while square or rectangular containers are better for leafy greens.

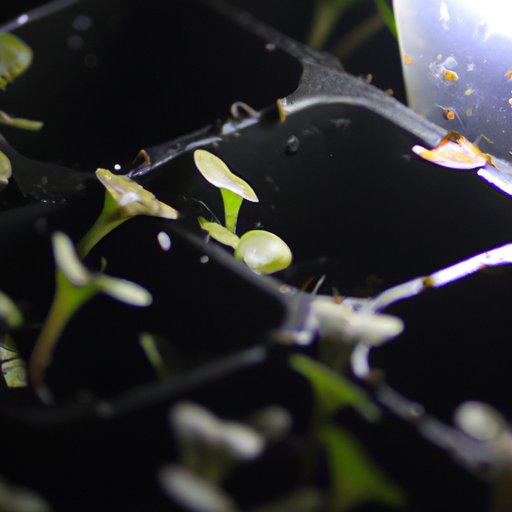
Plant Seeds at the Proper Depth
Once you have chosen the right containers, it is time to plant your seeds. It is important to plant the seeds at the proper depth in order to ensure that they will germinate properly. Different types of seeds require different depths for optimum germination, so it is important to research the specific needs of the variety you are planting.
Guidelines for Planting Depth
In general, most seeds should be planted about twice as deep as their diameter. For example, a seed that is 1/8 inch in diameter should be planted about ¼ inch deep. However, some seeds such as lettuce and radish need to be planted much shallower, only about 1/8 inch deep.
Considerations for Different Types of Seeds
It is also important to consider the characteristics of the seed when deciding on the planting depth. For example, larger, heavier seeds such as beans and peas need to be planted deeper than lighter, smaller seeds such as lettuce and carrots. Additionally, some seeds such as tomatoes and peppers need to be covered with a thin layer of soil after planting.

Provide Adequate Light and Moisture
Once the seeds have been planted, it is important to provide them with adequate light and moisture. Seedlings need plenty of light in order to grow and develop properly, so it is important to place the containers in an area that receives at least six hours of direct sunlight each day.
Amount of Light Needed
Seedlings also need plenty of light in order to photosynthesize and grow. If you do not have access to natural sunlight, you can use artificial lighting such as fluorescent bulbs or LED lights. Place the lights about two to four inches above the seedlings and leave them on for 14 to 16 hours per day.
Watering Tips
It is also important to water the seedlings regularly. Water the seedlings until the soil is evenly moist, but not soggy. Be careful not to overwater, as this can cause the soil to become waterlogged and inhibit germination. Water the seedlings in the morning so that the foliage has time to dry before nightfall.
Transplant Seedlings When Ready
Once the seedlings are established and have several sets of true leaves, they are ready to be transplanted outdoors. Transplanting seedlings too early can stunt their growth, so it is important to wait until they are big enough and the weather is suitable for transplanting. Generally, this is when the seedlings are 4 to 6 inches tall and all danger of frost has passed.
Timing of Transplanting
It is best to transplant seedlings on a cloudy day or in the evening to avoid shock. If the weather is hot and sunny, provide some shade for the seedlings until they become acclimated to their new environment.
Preparation Steps
Before transplanting, it is important to prepare the garden bed. Loosen the soil and add a layer of compost or other organic material. Make sure to dig a hole that is twice as deep and wide as the container. Place the seedling in the hole and gently fill in the soil around it. Water the seedling thoroughly and then mulch the area to help retain moisture.
Conclusion
Starting seedlings is a great way to get a jump start on the growing season. By following these simple steps – preparing a soil mix, choosing the right containers, planting seeds at the proper depth, providing adequate light and moisture, and transplanting seedlings when ready – you can ensure success in the garden.
(Note: Is this article not meeting your expectations? Do you have knowledge or insights to share? Unlock new opportunities and expand your reach by joining our authors team. Click Registration to join us and share your expertise with our readers.)