Introduction
Growing pumpkins from seed is a rewarding experience that can be enjoyed by gardeners of all ages and skill levels. Whether you’re looking to create a unique jack-o-lantern or add a beautiful autumnal touch to your home, starting pumpkin seeds can be an enjoyable and satisfying activity.
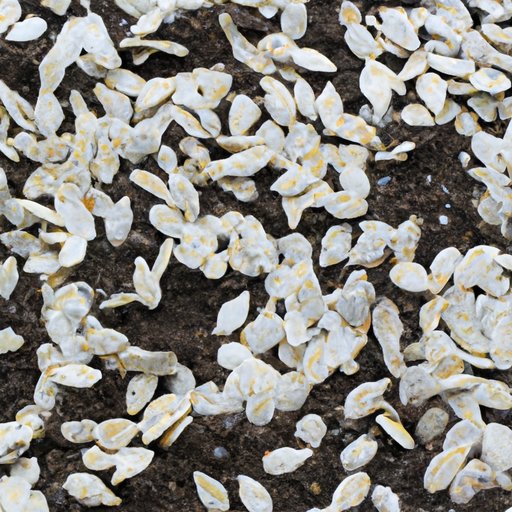
Pumpkin seeds are the edible seeds of a pumpkin or squash plant. They are typically oblong in shape and have a white, tan, or green outer shell. Inside the shell is a small, flat, cream-colored seed, which is the edible part of the seed.
The benefits of growing pumpkins from seed include having access to a wide range of varieties, being able to control the quality of the soil, and saving money by not having to purchase pre-grown plants.
Planting Pumpkin Seeds: Step-by-Step Guide
Follow these steps to learn how to start pumpkin seeds:
Choose the Right Variety
The first step in planting pumpkin seeds is to select the right variety for your needs. There are many different types of pumpkins, with some being better suited for baking, carving, or even eating raw. Consider the size and shape of the pumpkin, as well as any special requirements such as disease resistance or pest tolerance.
Acquire the Necessary Supplies
Once you’ve chosen the type of pumpkin you want to grow, it’s time to gather the supplies. You’ll need pumpkin seeds, soil, fertilizer, watering equipment, and a container for planting. Additionally, you may want to consider purchasing a trellis or other support structure if you plan on growing vining pumpkins.
Prepare the Soil
Before planting the seeds, it’s important to prepare the soil. This includes removing any weeds or debris, tilling the soil to break up clumps, and adding compost or manure to improve fertility. The soil should be light and airy, with a pH between 6.0 and 7.5.
Plant the Seeds
Once the soil is ready, it’s time to plant the seeds. Sow the seeds directly into the soil, spacing them about 4 inches apart and 1 inch deep. Water the area to moisten the soil and cover with a thin layer of mulch to keep the soil moist and prevent weeds from germinating.
Water and Fertilize
Keep the soil evenly moist but not soggy. When the seedlings emerge, begin fertilizing every two weeks with a balanced fertilizer. As the plants grow, increase the amount of fertilizer to ensure healthy growth.
Monitor Growth and Weed Control
Once the plants are established, monitor their growth and weed control. Keep the area free of weeds, as they can compete with the pumpkin plants for nutrients and water. If necessary, use an herbicide to control weeds. Prune off any dead or diseased leaves or stems to encourage new growth.
How to Grow Pumpkins from Seed
The Basics of Starting Pumpkin Seeds Indoors
If you’d like to get a head start on the growing season, you can start your pumpkin seeds indoors. Fill pots with potting soil and sow the seeds about ¼ inch deep. Place the pots in a sunny spot and water regularly. When the seedlings have reached 3-4 inches in height, transplant them outdoors.
When and Where to Plant Pumpkin Seeds
Pumpkin seeds should be planted when the soil temperature reaches at least 60°F (16°C). The best place to plant pumpkin seeds is in an area that receives full sun and has well-draining soil. Avoid planting in areas where water tends to pool, as this can lead to root rot.
How to Prepare Soil for Planting Pumpkin Seeds
Before planting pumpkin seeds, it’s important to prepare the soil. This can be done by tilling the soil to a depth of 8-12 inches and adding organic matter such as compost or manure. The soil should also be tested for pH and adjusted, if necessary, to ensure proper nutrition for the plants.

Tips for Growing Pumpkin Plants from Seed
Provide Adequate Sunlight
Pumpkin plants require at least 6 hours of direct sunlight each day. If possible, try to provide more than this, as this will help the plants grow faster and produce larger fruits. If the area is particularly hot, provide some shade during the hottest part of the day.
Mulch Around the Plant
Mulching around the pumpkin plants will help conserve moisture and suppress weeds. Use a thick layer of organic mulch, such as straw or shredded leaves, to keep the soil cool and moist and reduce weeds.
Thin Out the Seedlings
Once the plants have emerged, thin out the seedlings so that only the healthiest and strongest plants remain. Aim for one plant per square foot, and remove any weak or diseased plants.
Control Pests and Diseases
Pumpkins can be susceptible to pests and diseases, so it’s important to take measures to protect the plants. Monitor the plants regularly and take action as soon as any signs of infestation or disease appear. Remove affected leaves or stems and spray the plants with an appropriate pesticide or fungicide.
Harvesting and Storing the Pumpkins
When the pumpkins are fully mature, cut them from the vine using pruning shears. Allow the pumpkins to cure in the sun for several days before storing. Once cured, store the pumpkins in a cool, dry place with good air circulation.
Conclusion
Growing pumpkins from seed can be a fun and rewarding experience. By following the steps outlined above, you can successfully start pumpkin seeds and grow healthy plants that will produce delicious fruits. With patience, dedication, and the right knowledge, anyone can enjoy the satisfaction of harvesting their own pumpkins.
(Note: Is this article not meeting your expectations? Do you have knowledge or insights to share? Unlock new opportunities and expand your reach by joining our authors team. Click Registration to join us and share your expertise with our readers.)