Introduction
Embroidery stitching is a creative craft that has been practiced for centuries. It involves using a needle and thread to create intricate designs on fabric. Not only is it a great way to express your creativity and make unique pieces, but it can also be very relaxing and therapeutic. This article will provide a step-by-step guide to starting an embroidery stitch, as well as helpful tips for beginners.
Step-by-Step Guide to Starting an Embroidery Stitch
Before you get started with embroidery stitching, there are a few things you need to do in order to prepare. Here is a step-by-step guide to help you get started:
Gather Supplies
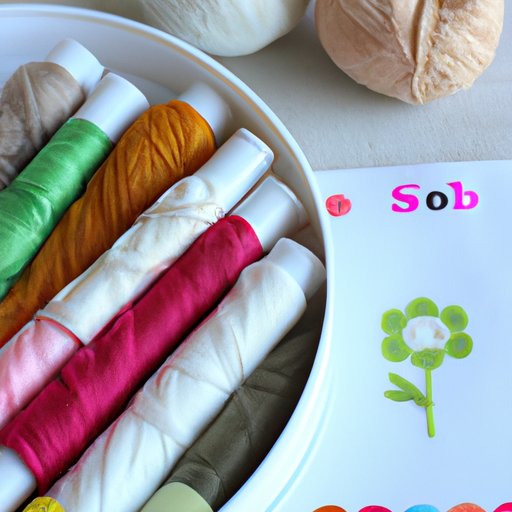
The first step is to gather all of the supplies you need. You will need a needle, thread, fabric, scissors, and an embroidery hoop (optional). You may also want to have some other items such as a thimble, pincushion, or transfer paper.
Prepare Fabric
Once you have all of your supplies, you will need to prepare the fabric. Wash and iron the fabric before beginning to ensure that it is free of wrinkles and dirt. If you are using an embroidery hoop, place the fabric in the hoop and tighten it so that it is taut. If you are not using a hoop, you can simply pin the fabric to a flat surface.
Create a Design
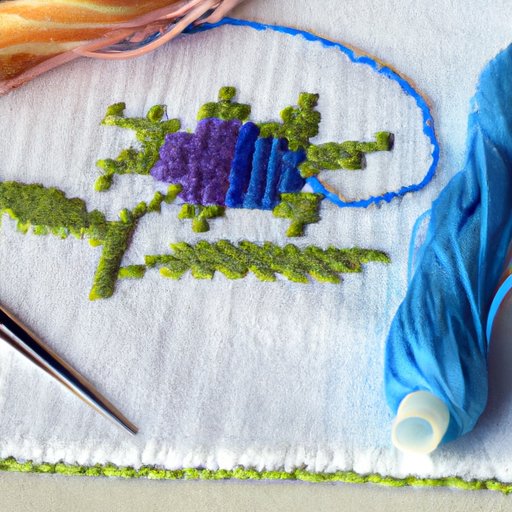
Next, you will need to create a design for your project. You can draw your own design or use a pattern from a book or online. Make sure to plan out the colors of thread that you will need for your design.
Transfer the Design to the Fabric
Once you have a design, you will need to transfer it to the fabric. You can use a water-soluble marker or transfer paper to do this. Simply trace the design onto the fabric and then remove the paper or marker when you are done.
Thread the Needle
Now it’s time to start stitching! Begin by threading the needle with the color of thread that you will be using for your project. Make sure to double check that the thread is securely attached to the needle before you begin.
Begin Working the Stitch
Once the needle is threaded, you can begin working the stitch. Start at the top of the design and work your way down, following the lines of the design. As you stitch, keep the thread tight and make sure that the stitches are even and consistent. Take your time and enjoy the process!
Tips for Beginners on How to Get Started with Embroidery Stitching
Embroidery stitching can be intimidating for beginners, but it doesn’t have to be. Here are a few tips to help you get started:
Practice on a Sample Piece of Fabric
Before you start working on your final project, practice on a sample piece of fabric. This will allow you to get comfortable with the stitches and techniques before attempting the real thing.
Start with Simple Stitches
When you’re just getting started, it’s best to begin with simple stitches. Try practicing the running stitch, back stitch, split stitch, and satin stitch. Once you feel comfortable with these stitches, you can move on to more complex ones.
Use Quality Thread and Supplies
It is important to use quality thread and supplies when you are embroidering. Invest in good quality needles, thread, fabric, and any other supplies you may need. This will ensure that your project turns out looking its best.
The Basics of Embroidery Stitching: What You Need to Know
In order to successfully complete an embroidery project, there are a few basics that you need to know. Here is an overview of the different types of needles, threads and fabrics, tools and accessories that you may need for your project:
Types of Needles
Embroidery needles come in various sizes and shapes. The size of the needle you should use depends on the type of fabric and thread you are using. Generally, smaller needles are used for lighter fabrics and thicker threads, while larger needles are used for heavier fabrics and thinner threads.
Threads & Fabrics
The type of thread and fabric you use will depend on the project you are working on. For example, if you are making a quilt, you will need to use a heavier fabric such as cotton or linen, and a stronger thread such as polyester or nylon. If you are making a garment, you may want to use a lighter fabric such as silk or rayon, and a finer thread such as cotton or silk.
Tools & Accessories
There are many tools and accessories that you may need for an embroidery project. An embroidery hoop can be used to hold the fabric in place while you work. You may also need scissors, pins, a thimble, and a pincushion.
How to Choose the Right Embroidery Thread and Supplies
Choosing the right thread and supplies for your project is essential for achieving the best results. Here are some tips for choosing the right materials for your project:
Consider Your Project
The type of thread and supplies you need will depend on the project you are working on. Consider the type of fabric you are using and the type of stitch you will be using. This will help you determine what type of thread and supplies you need.
Choose Quality Thread and Supplies
It is important to invest in quality thread and supplies. According to the American Sewing Guild, “Quality thread and supplies will ensure that your finished product looks professional and lasts longer.”
An Overview of Different Types of Embroidery Stitches and How to Use Them
Once you have the basics down, you can start exploring different types of embroidery stitches. Here is an overview of some of the most common stitches and how to use them:
Running Stitch
The running stitch is one of the simplest and most versatile stitches. It is composed of small, uniform stitches that form a line. It is often used to outline shapes or to add texture to a design.
Back Stitch
The back stitch is similar to the running stitch but is much stronger. It is composed of two small stitches followed by one larger stitch. It is often used to create outlines or to join two pieces of fabric together.
Split Stitch
The split stitch is a variation of the back stitch. It is composed of small stitches that overlap each other, creating a raised effect. It is often used to create lettering or to add texture to a design.
Satin Stitch
The satin stitch is a decorative stitch that is composed of small, straight stitches that are closely packed together. It is often used to fill in shapes or to create patterns.
French Knot
The French knot is a decorative stitch that is composed of a small knot in the center of the fabric. It is often used to add texture or to create a 3D effect.
Chain Stitch
The chain stitch is a looped stitch that is often used to create a border or to add texture to a design. It is composed of small loops that are connected together to form a chain-like pattern.
Lazy Daisy Stitch
The lazy daisy stitch is a decorative stitch that is composed of small petals that are connected together. It is often used to create flowers or other decorative elements.
Conclusion
Embroidery stitching is a fun and rewarding craft. With a few basic supplies and a bit of practice, you can easily get started with embroidery stitching. This article provided a step-by-step guide to starting an embroidery stitch, as well as tips for beginners. It also covered the basics of embroidery stitching and how to choose the right thread and supplies.
(Note: Is this article not meeting your expectations? Do you have knowledge or insights to share? Unlock new opportunities and expand your reach by joining our authors team. Click Registration to join us and share your expertise with our readers.)