Introduction
A dry well is a great way to manage excess water runoff from your property. It is an underground structure that collects and diverts water away from your home or other structures. This can be especially beneficial in areas prone to flooding or where there are no municipal storm drains. With a dry well, you can direct water away from your foundation and landscaping, protecting it from potential damage.
Building a dry well is relatively simple and can be done with minimal cost. However, it’s important to understand the steps involved and to plan carefully before beginning the project. This article will provide an overview of the benefits and uses of a dry well, as well as detailed instructions for building one.
Determine the Size of Your Dry Well
Before building a dry well, you need to determine its size. The size of your dry well will depend on the amount of water runoff you want to collect and divert. Generally, a dry well should be large enough to accommodate about three times the amount of runoff it will receive.
When calculating the size of your dry well, consider the following factors:
- The amount of rainfall in your area
- The size of the area where the water will be collected
- The type of soil in the area
- The size of any existing drainage systems
Once you have taken these factors into account, you can calculate the size of your dry well. To do this, multiply the area of the collection area by the amount of rainfall in your area and then divide by three. This will give you the approximate size of your dry well.
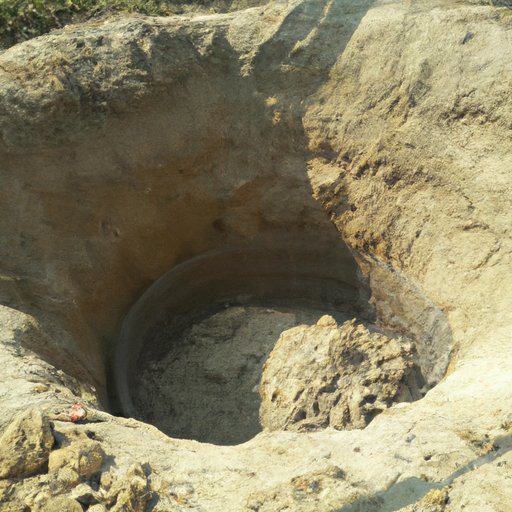
Dig a Hole for the Dry Well
Once you’ve determined the size of your dry well, you can begin digging the hole. This is best done with a shovel, but you may also need other tools depending on the size of your dry well and the type of soil you’re digging in.
It’s important to take safety precautions when digging the hole. Wear protective clothing, such as gloves, goggles, and a dust mask, and make sure to keep the area clear of any debris or sharp objects. Also, be sure to mark off the area you’ll be digging in so that no one trips or falls into the hole.
Once you’ve taken safety measures, you can begin digging the hole. Here’s a step-by-step guide to help you get started:
- Mark off the area where you’ll be digging the hole.
- Dig a trench around the perimeter of the marked area.
- Dig down to the desired depth of the dry well.
- Use a trowel to dig out any corners or edges of the hole.
- Shovel out any loose dirt from the bottom of the hole.
Line the Inside of the Hole with Gravel
Once the hole has been dug, you’ll need to line the inside with gravel. This will help to ensure that the dry well functions properly and allows water to flow freely. To do this, you’ll need coarse gravel, sand, and a bucket.
Here’s a step-by-step guide to help you get started:
- Fill the bucket with gravel and sand and mix them together.
- Pour the gravel and sand mixture into the bottom of the hole.
- Spread the gravel and sand evenly across the bottom of the hole.
- Continue filling and spreading until the entire bottom of the hole is covered.
- Use a rake to level the gravel and sand.
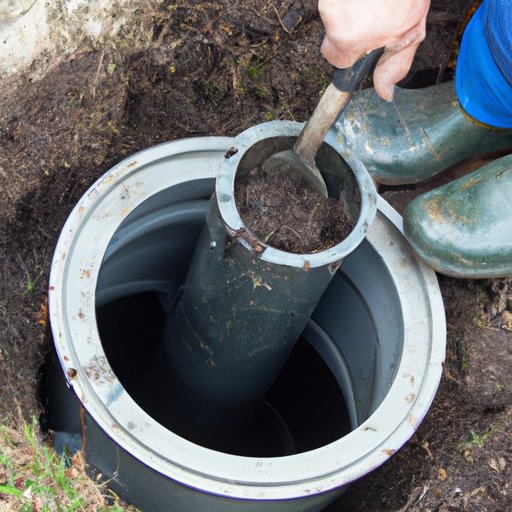
Place a Perforated Pipe at the Bottom of the Hole
Once the inside of the hole has been lined with gravel, you’ll need to place a perforated pipe at the bottom. This pipe will allow water to enter the dry well and be directed away from your home or other structures.
To place the pipe, you’ll need a PVC pipe cutter, a length of perforated PVC pipe, and sealant. Here’s a step-by-step guide to help you get started:
- Measure and cut the length of pipe needed for your dry well.
- Apply sealant to the ends of the pipe.
- Place the pipe at the bottom of the hole.
- Check the pipe to make sure it is securely in place.
- Apply more sealant to the joints if necessary.

Fill the Hole with Gravel and Sand
Once the pipe is in place, you can begin filling the hole with gravel and sand. This will help to support the pipe and provide a base for the dry well. You’ll need coarse gravel, sand, and a shovel.
Here’s a step-by-step guide to help you get started:
- Begin by filling the hole with gravel.
- Use a shovel to spread the gravel evenly across the bottom of the hole.
- Add sand to the hole and use a rake to level it out.
- Continue adding gravel and sand until the hole is filled.
- Use a shovel to compact the gravel and sand.

Cover the Dry Well with Landscaping Fabric
Once the hole is filled with gravel and sand, you’ll need to cover the dry well with landscaping fabric. This will help to keep debris out of the dry well and allow water to flow freely. You’ll need landscaping fabric, staples, and a stapler.
Here’s a step-by-step guide to help you get started:
- Cut the fabric to fit the size of the dry well.
- Lay the fabric over the top of the dry well.
- Secure the fabric to the sides of the dry well with staples.
- Trim any excess fabric.
- Check the fabric to make sure it is securely in place.

Backfill Around the Dry Well and Secure the Cover
Once the dry well has been covered with fabric, you can begin backfilling the hole. This will help to protect the dry well from potential damage and prevent water from entering the dry well. You’ll need soil, sand, and a shovel.
Here’s a step-by-step guide to help you get started:
- Fill the hole with soil.
- Tamp down the soil with a shovel.
- Add sand to the hole and tamp down again.
- Continue adding soil and sand until the hole is filled.
- Secure the cover with stakes or concrete blocks.
Conclusion
Building a dry well is a relatively simple process that can be done with minimal cost. By following the steps outlined above, you can easily construct a dry well that will effectively manage water runoff from your property. Not only will this protect your home and landscaping from potential damage, but it will also help to conserve water.
In summary, here are the steps for building a dry well: calculate the size of the dry well, dig a hole, line the inside with gravel, place a perforated pipe at the bottom of the hole, fill the hole with gravel and sand, cover the dry well with landscaping fabric, and backfill around the dry well and secure the cover. With these steps, you can easily create a dry well that will last for years to come.
(Note: Is this article not meeting your expectations? Do you have knowledge or insights to share? Unlock new opportunities and expand your reach by joining our authors team. Click Registration to join us and share your expertise with our readers.)