Introduction
Cake pops are a fun and tasty treat that are perfect for any occasion. Whether you’re throwing a birthday party, hosting a baby shower, or just want to satisfy your sweet tooth, cake pops are sure to be a hit. The best part is that you can make them well in advance, so you don’t have to worry about last-minute prep work. But how far in advance can you make cake pops? Read on to find out.
Definition of Cake Pops
Cake pops are essentially cake balls made from crumbled cake mixed with frosting and then dipped in melted chocolate. They are usually served on sticks and decorated with sprinkles or other toppings. Cake pops are easy to make and can be customized to suit any occasion.
Overview of the Problem
Making cake pops in advance can save you time and stress when it comes to preparing for a big event. But knowing exactly how far in advance you can make them is key to ensuring that they taste great and look presentable. Fortunately, there are several methods you can use to make cake pops in advance, depending on how much time you have.
Step-by-Step Guide to Preparing Cake Pops Ahead of Time
Whether you have days, weeks, or months to prepare, here’s a step-by-step guide to making cake pops in advance.
Gather Your Ingredients
The first step is to gather all the ingredients you’ll need to make your cake pops. This includes cake mix, frosting, chocolate, and any decorations you may want to use. You’ll also need lollipop sticks and wax paper.
Prepare and Bake the Cake
Next, prepare the cake according to the instructions on the box. Once it’s done baking, let it cool completely before proceeding.
Let Cool and Crumble
Once the cake has cooled, crumble it into fine pieces using your hands or a food processor. Make sure the crumbs are evenly distributed.
Mix in Frosting and Form into Balls
Add a few spoonfuls of frosting and mix it in with the crumbled cake. Use your hands to form the mixture into small balls. Place them on a baking sheet lined with wax paper and refrigerate until firm.
Dip into Melted Chocolate
Melt the chocolate in a double boiler or microwave. Dip each ball into the chocolate, making sure it’s completely coated. Let the excess chocolate drip off before placing the pops back on the wax paper.
Refrigerate until Ready to Serve
Once all the pops are covered in chocolate, place them in the refrigerator for at least an hour to allow the chocolate to set. When you’re ready to serve, simply remove them from the refrigerator and enjoy!

Tips for Making Cake Pops in Advance
Making cake pops ahead of time can be a great way to save time and stress. Here are some tips to keep in mind when prepping your cake pops in advance.
Freeze Uncoated Cake Pops
If you’re short on time, you can freeze the uncoated cake pops for up to two weeks. Just make sure to wrap them tightly in plastic wrap before placing them in the freezer.
Use a Styrofoam Block to Keep Them Upright
When freezing the cake pops, use a styrofoam block to keep them upright and prevent them from sticking together. This will also help the chocolate coating adhere better once the pops are thawed.
Double Dip for Extra Coverage
For extra coverage, try double dipping the cake pops. This will ensure that the pops are fully covered in chocolate and won’t fall apart when you take a bite.
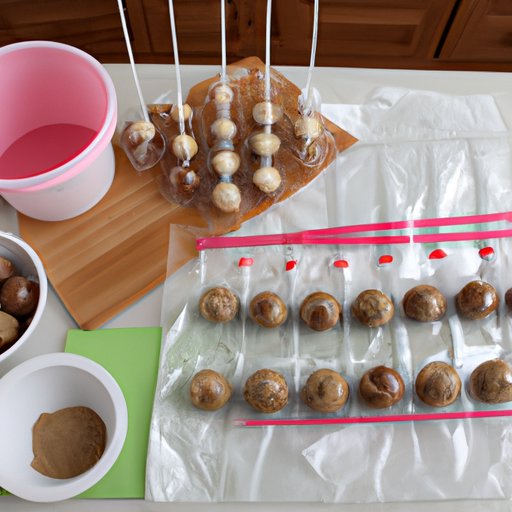
Allow to Set in the Freezer Before Bagging
Once the pops are double dipped, place them in the freezer for at least an hour to allow the chocolate to set. Then, transfer them to airtight containers or zip-top bags before storing in the freezer.
Freeze and Bake: How to Make Cake Pops Days Before Your Event
If you have a few days to prepare your cake pops, you can freeze them and bake them right before your event. This will ensure that your pops are fresh and delicious.
Freeze Coated Cake Pops
Once the pops are double dipped, place them on a baking sheet lined with wax paper and freeze for a few hours to allow the chocolate to set. Then, transfer them to airtight containers or zip-top bags and store in the freezer.
Place in Airtight Containers
Once the pops are frozen, transfer them to airtight containers or zip-top bags and store in the freezer. Make sure they are well sealed to prevent freezer burn.
Freeze Until Ready to Bake
On the day of your event, remove the pops from the freezer and allow them to thaw slightly. Preheat your oven to 350°F and bake the pops for 8-10 minutes. Allow them to cool before serving.

Maximize Your Time: How to Prepare Cake Pops Weeks in Advance
If you’re looking to maximize your time, you can make cake pops weeks in advance and store them in the freezer until you’re ready to serve them.
Prepare Cake Base and Freeze
Start by preparing the cake base according to the instructions on the box. Once it’s done baking, let it cool completely before crumbling it into fine pieces. Place the crumbled cake on a baking sheet lined with wax paper and freeze for a few hours.
Thaw and Add Frosting, Form into Balls
Once the cake is frozen, remove it from the freezer and let it thaw slightly. Add a few spoonfuls of frosting and mix it in with the crumbled cake. Use your hands to form the mixture into small balls and place them on a baking sheet lined with wax paper.
Double Dip and Freeze Again
Melt the chocolate and dip each ball into the chocolate, making sure it’s completely coated. Let the excess chocolate drip off before placing the pops back on the wax paper. Place the baking sheet in the freezer for a few hours to allow the chocolate to set.
Package in Airtight Containers
Once the pops are frozen, transfer them to airtight containers or zip-top bags and store in the freezer. Make sure they are well sealed to prevent freezer burn.
Freeze Until Ready to Serve
On the day of your event, remove the pops from the freezer and allow them to thaw slightly before serving.

Make Ahead Meals: How to Create Delicious Cake Pops Long Before the Big Day
If you’re planning a big event months in advance, you can still make delicious cake pops with plenty of time to spare.
Prepare Cake Base and Bake
Start by preparing the cake base according to the instructions on the box. Once it’s done baking, let it cool completely before crumbling it into fine pieces.
Let Cool and Crumble
Once the cake has cooled, crumble it into fine pieces using your hands or a food processor. Make sure the crumbs are evenly distributed.
Mix with Frosting and Form into Balls
Add a few spoonfuls of frosting and mix it in with the crumbled cake. Use your hands to form the mixture into small balls.
Dip into Melted Chocolate
Melt the chocolate in a double boiler or microwave. Dip each ball into the chocolate, making sure it’s completely coated. Let the excess chocolate drip off before placing the pops back on the wax paper.
Place on Wax Paper and Freeze
Once all the pops are covered in chocolate, place them on a baking sheet lined with wax paper and freeze until solid.
Once Frozen, Place in Airtight Containers
Once the pops are frozen, transfer them to airtight containers or zip-top bags and store in the freezer for up to three months.
Conclusion
Making cake pops in advance is a great way to save time and stress when it comes to preparing for a big event. With a little bit of planning, you can make delicious cake pops days, weeks, or even months in advance. Just remember to freeze uncoated cake pops, use a styrofoam block to keep them upright, double dip for extra coverage, and allow to set in the freezer before bagging.
(Note: Is this article not meeting your expectations? Do you have knowledge or insights to share? Unlock new opportunities and expand your reach by joining our authors team. Click Registration to join us and share your expertise with our readers.)