Introduction
A Litter Robot is an automated litter box that uses sensors and a timer to self-clean after each use. It’s designed to make cleaning up after your pet easier and less time-consuming. The Litter Robot also reduces odors and keeps your home smelling fresh. But in order to keep it working properly and smelling good, you need to regularly clean your Litter Robot.
Why is it important to keep your litter robot clean?
Cleaning your Litter Robot is important for several reasons. First, it prevents the build-up of bacteria and germs, which can cause illness. Regular cleaning also helps reduce odors and keeps your home smelling fresh. Finally, keeping your Litter Robot clean ensures that it will last longer and continue to work effectively.
Step-by-Step Guide to Cleaning Your Litter Robot
Cleaning your Litter Robot is easy, and only takes a few minutes. Here’s a step-by-step guide to help you get started:
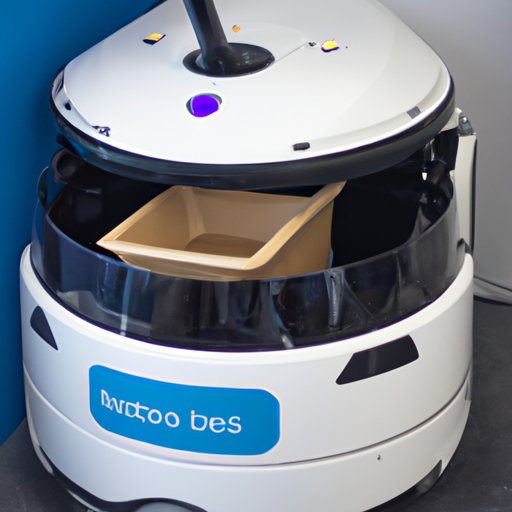
1. Remove the Waste from the Drawer
The first step is to remove the waste from the drawer. You can use a scooper or your hands to do this. Be sure to dispose of the waste in a garbage bag or other appropriate container. Once you’ve removed all the waste, you can move on to the next step.
2. Empty and Wipe Down the Drawer and Litter Box
Next, empty the drawer and wipe down the inside and outside of the litter box with a damp cloth. If there are any stubborn stains, you may need to use a mild cleaner. Once you’ve wiped down the litter box, you can move on to the next step.
3. Vacuum or Sweep Up the Excess Litter
Once you’ve emptied the drawer and wiped down the litter box, you should vacuum or sweep up the excess litter that has accumulated around the litter box. This will help prevent the build-up of dust and debris. Once you’ve vacuumed or swept up the litter, you can move on to the next step.
4. Disinfect the Litter Box
After you’ve vacuumed or swept up the excess litter, you should disinfect the litter box. To do this, use a mild cleaner and a damp cloth. Make sure to get into all the nooks and crannies of the litter box. Once you’ve finished disinfecting the litter box, you can move on to the next step.
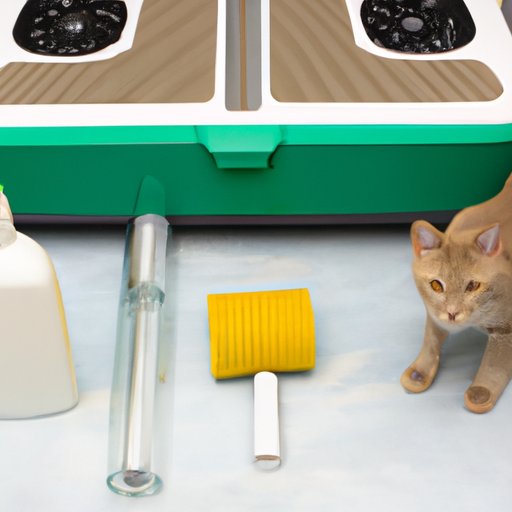
Tips for Maintaining a Clean and Odor-Free Litter Robot
In addition to regular cleaning, there are some simple steps you can take to maintain a clean and odor-free Litter Robot. These include:
1. Regularly Clean the Drawer
You should regularly clean the drawer to prevent the build-up of bacteria and germs. Use a mild cleaner and a damp cloth to wipe down the inside and outside of the drawer. You should also use a vacuum to remove any excess litter.
2. Change the Litter Regularly
You should change the litter regularly to ensure that it stays fresh and free of odors. Aim to change the litter every two weeks. This will help reduce odors and keep your home smelling fresh.
3. Use Odor Neutralizers
Odor neutralizers can help reduce odors and keep your Litter Robot smelling fresh. Look for natural products like baking soda or essential oils that are safe for pets. Place these near the litter box to help eliminate odors.

5 Simple Ways to Keep Your Litter Robot Looking and Smelling Fresh
There are a few simple steps you can take to keep your Litter Robot looking and smelling fresh. These include:
1. Use Natural Deodorizers
You can use natural deodorizers like baking soda or essential oils to help reduce odors. Place them near the litter box to help eliminate odors.
2. Place the Litter Robot in a Well-Ventilated Area
Make sure the litter box is placed in a well-ventilated area. This will help reduce odors and keep your home smelling fresh.
3. Place an Air Freshener Nearby
Placing an air freshener near the litter box can help reduce odors and keep your home smelling fresh. Look for natural products like essential oils that are safe for pets.
4. Use Baking Soda
Baking soda is a natural deodorizer and can help absorb odors. Sprinkle some baking soda in the litter box to help reduce odors.
5. Replace the Litter Every Two Weeks
Replacing the litter every two weeks can help reduce odors and keep your home smelling fresh. Aim to replace the litter every two weeks to ensure that it stays fresh and free of odors.
How to Properly Dispose of Waste from Your Litter Robot
When it comes to disposing of waste from your Litter Robot, it’s important to separate the compostable and non-compostable materials. Compostable materials should be placed in a compost bin, while non-compostable materials should be placed in a garbage bag. This will help ensure that the waste is disposed of properly.
The Best Products to Use When Cleaning Your Litter Robot
When it comes to cleaning your Litter Robot, there are a few products that can help. Natural cleaners, disinfectants, and odor neutralizers are all great products to use. Look for natural products that are safe for pets.
A Comprehensive Checklist for Cleaning Your Litter Robot
To help you keep track of your cleaning routine, here is a comprehensive checklist for cleaning your Litter Robot:
1. Empty the Drawer
2. Vacuum or Sweep Up the Litter
3. Disinfect the Litter Box
4. Use Natural Deodorizers
5. Separate Waste into Compostable and Non-Compostable Materials
6. Replace the Litter Every Two Weeks
Conclusion
Cleaning your Litter Robot is easy and only takes a few minutes. By following the steps outlined in this guide, you can ensure that your Litter Robot stays clean and odor-free. Regular cleaning and maintenance will also help extend the life of your Litter Robot and keep it working properly. With a little effort, you can keep your Litter Robot looking and smelling fresh.
(Note: Is this article not meeting your expectations? Do you have knowledge or insights to share? Unlock new opportunities and expand your reach by joining our authors team. Click Registration to join us and share your expertise with our readers.)