Introduction
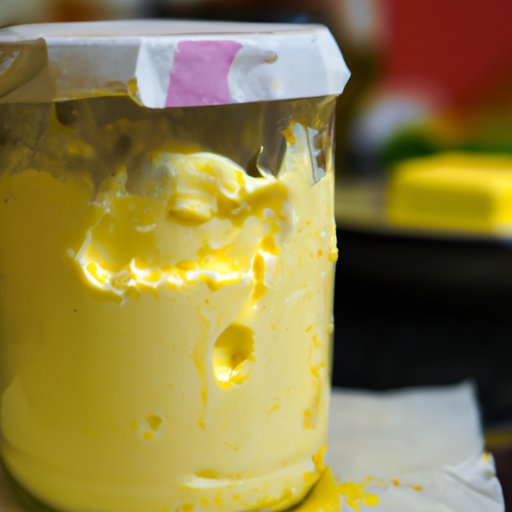
Cultured butter is a type of butter that has been made using traditional methods, where cream is allowed to clabber or sour before it is churned into butter. This process adds extra flavor, aroma, and complexity to the butter, resulting in a product that is much tastier than regular store-bought butter. Making cultured butter at home can be a rewarding experience, as it allows you to create a unique and delicious product that you can enjoy for months.
Step-by-Step Guide to Making Cultured Butter
Making cultured butter at home is not difficult, but it does require some patience and attention to detail. Here is a step-by-step guide to help you get started:
1. Gather Necessary Ingredients: You will need high quality milk, a starter culture, and salt to make cultured butter. The type of milk you use is important, as it will affect the flavor and texture of the finished product. Whole milk is ideal, but you can also use skimmed or low fat milk if desired. The starter culture can be either a mesophilic or thermophilic culture, depending on the type of butter you are trying to make. Lastly, the amount of salt used should be adjusted to taste.
2. Begin Fermentation Process: Once you have gathered all of the necessary ingredients, you can begin the fermentation process. Start by heating the milk to approximately 86°F (30°C). Then, add the starter culture and stir thoroughly. Cover the pot and allow the mixture to sit undisturbed for 12-24 hours, depending on the type of culture being used.
3. Allow Milk to Clabber: After the fermentation period is complete, the milk should have thickened and developed a slightly sour aroma. This is known as “clabbered” milk. Remove the lid from the pot and allow the mixture to cool to room temperature.
4. Separate the Cream: Once the milk has cooled, you can separate the cream from the whey. Use a slotted spoon to carefully scoop out the thickened cream from the top of the pot. Place the cream in a clean bowl and set aside.
5. Add Culture and Let Sit: Next, add the remaining starter culture to the cream and stir until completely combined. Cover the bowl and allow the mixture to sit undisturbed for 8-12 hours, or until the desired tanginess has been achieved.
6. Whip Cream Until it Reaches Desired Consistency: Once the desired tanginess has been achieved, you can begin to whip the cream. Use an electric mixer on medium speed to whip the cream until it reaches a thick, spreadable consistency. Be sure to scrape down the sides of the bowl periodically to ensure even whipping.
7. Refrigerate and Enjoy! Finally, transfer the whipped cream to an airtight container and refrigerate until ready to use. Your homemade cultured butter is now ready to enjoy!
A Beginner’s Guide to Crafting Delicious Cultured Butter
Making cultured butter at home can be a fun and rewarding experience, but it does require some knowledge and skill. Here are some tips for beginners to help ensure success:
Choose the Best Quality Milk: The quality of the milk you use is very important, as it will affect both the flavor and texture of the finished product. Choose a high quality milk with no additives or preservatives for the best results.
Decide on a Culturing Agent: There are two main types of culturing agents that can be used to make cultured butter: mesophilic and thermophilic. Mesophilic cultures are best suited for milder flavored butter, while thermophilic cultures are better for more robust flavors. Choose the one that best suits your taste preferences.
Measure Properly: Measure out the ingredients carefully to ensure the correct ratios are used. Too much or too little of any ingredient can affect the flavor and texture of the finished product.
Monitor Temperature: It is important to keep the temperature of the milk within the specified range throughout the entire process. If the temperature is too high or too low, the culturing process may not work properly.
Stir Frequently: Stirring the mixture regularly will help to ensure even culturing and prevent the formation of large chunks of butter.

How to Create Perfectly Tangy Cultured Butter at Home
Creating the perfect balance of tanginess in your cultured butter is key to achieving the desired flavor. Here are some tips for crafting perfectly tangy butter:
Select Appropriate Cultures: The type of culture you use will have a direct effect on the level of tanginess in the finished product. Choose a culture that is designed to produce the desired level of tanginess.
Use Room Temperature Milk: It is important to use room temperature milk when culturing butter, as this will ensure the culturing process works properly. Cold milk can slow down the process and prevent proper culturing.
Monitor Time and Temperature: As mentioned above, it is important to keep an eye on both the time and temperature of the process. Too much or too little of either can lead to an undesired level of tanginess.
Adjust the Tanginess Level: If the butter ends up too tangy or not tangy enough, you can adjust the level of tanginess by adding more or less starter culture. Taste the butter as you go and adjust as needed.

From Milk to Butter: An Easy Guide to Making Cultured Butter
Making your own cultured butter at home is easy and rewarding. Here is an easy guide to help you get started:
Start with High Quality Milk: Choose a high quality, additive-free milk for the best results. Whole milk is ideal, but you can also use skimmed or low fat milk if desired.
Add Starter Culture: Once the milk has been heated to the proper temperature, add the starter culture and stir until completely combined. Cover the pot and allow the mixture to sit undisturbed for 12-24 hours, depending on the type of culture being used.
Allow to Clabber: Once the fermentation period is complete, the milk should have thickened and developed a slightly sour aroma. This is known as “clabbered” milk. Remove the lid from the pot and allow the mixture to cool to room temperature.
Separate Cream: Use a slotted spoon to carefully scoop out the thickened cream from the top of the pot. Place the cream in a clean bowl and set aside.
Whip Cream until Desired Consistency: Add the remaining starter culture to the cream and stir until completely combined. Cover the bowl and allow the mixture to sit undisturbed for 8-12 hours, or until the desired tanginess has been achieved. Then, use an electric mixer on medium speed to whip the cream until it reaches a thick, spreadable consistency. Be sure to scrape down the sides of the bowl periodically to ensure even whipping.
Refrigerate and Enjoy! Transfer the whipped cream to an airtight container and refrigerate until ready to use. Your homemade cultured butter is now ready to enjoy!
Making Cultured Butter: Tips, Tricks and Techniques
Making cultured butter at home can be a challenging but rewarding experience. Here are some tips, tricks, and techniques to help you get the most out of your homemade butter:
Choose High Quality Milk: The quality of the milk you use is very important, as it will affect both the flavor and texture of the finished product. Choose a high quality milk with no additives or preservatives for the best results.
Use Fresh Starter Culture: Make sure to use a fresh starter culture for each batch of cultured butter you make. Old or expired cultures can affect the flavor and texture of the finished product.
Monitor Temperature: It is important to keep the temperature of the milk within the specified range throughout the entire process. If the temperature is too high or too low, the culturing process may not work properly.
Stir Frequently: Stirring the mixture regularly will help to ensure even culturing and prevent the formation of large chunks of butter.
Adjust Tanginess Level to Taste: The level of tanginess in the finished product is largely up to personal preference. Taste the butter as you go and adjust the amount of starter culture as needed to achieve the desired level of tanginess.
DIY Cultured Butter: A Comprehensive Guide
Making your own cultured butter at home is easy and rewarding. Here is a comprehensive guide to help ensure success:
Choose the Right Milk: The type of milk you use is important, as it will affect the flavor and texture of the finished product. Whole milk is ideal, but you can also use skimmed or low fat milk if desired.
Measure Carefully: Measure out the ingredients carefully to ensure the correct ratios are used. Too much or too little of any ingredient can affect the flavor and texture of the finished product.
Control Time and Temperature: It is important to keep the temperature of the milk within the specified range throughout the entire process. Also, monitor the time closely and adjust as needed to achieve the desired level of tanginess.
Separate the Cream: Once the milk has cooled, use a slotted spoon to carefully scoop out the thickened cream from the top of the pot. Place the cream in a clean bowl and set aside.
Whip Cream until Desired Consistency: Add the remaining starter culture to the cream and stir until completely combined. Cover the bowl and allow the mixture to sit undisturbed for 8-12 hours, or until the desired tanginess has been achieved. Then, use an electric mixer on medium speed to whip the cream until it reaches a thick, spreadable consistency. Be sure to scrape down the sides of the bowl periodically to ensure even whipping.
Refrigerate and Enjoy! Transfer the whipped cream to an airtight container and refrigerate until ready to use. Your homemade cultured butter is now ready to enjoy!
Conclusion
Making cultured butter at home is a fun and rewarding experience. With the right ingredients, equipment, and techniques, you can easily craft delicious, tangy butter that is sure to impress.
(Note: Is this article not meeting your expectations? Do you have knowledge or insights to share? Unlock new opportunities and expand your reach by joining our authors team. Click Registration to join us and share your expertise with our readers.)