Introduction
Nailing shingles architecturally is an important skill for anyone looking to install a roof. Not only does it ensure that your roof is properly installed, but it also provides an attractive and durable finish. In this article, we’ll look at what nailing shingles architecturally entails, the steps involved in the process, and the best practices for nailing shingles.
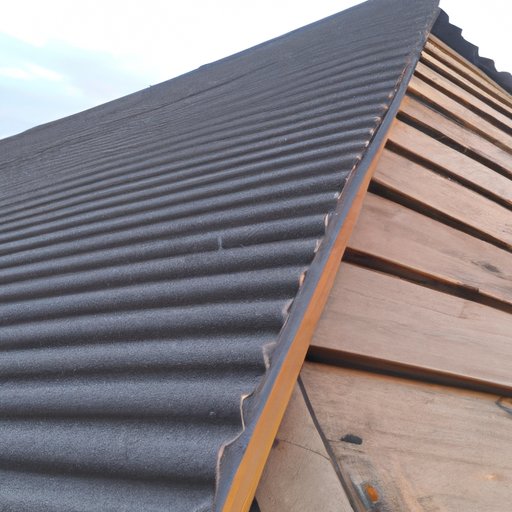
What Is Nailing Shingles Architecturally?
Nailing shingles architecturally refers to the process of securely attaching asphalt shingles to a roof using nails. This process is necessary to ensure that your roof is properly and securely attached, as well as providing a finished, attractive appearance. It’s important to note that not all nails are created equal and that different types of nails are better suited for different types of shingles.
Why Is It Important to Nail Shingles Architecturally?
Nailing shingles architecturally is important for several reasons. Firstly, it ensures that your roof is securely attached, reducing the risk of water damage and other issues. Secondly, it creates an attractive finish, giving your home a more polished look. Finally, nailing shingles architecturally helps to extend the life of your roof, as it prevents the shingles from shifting or becoming loose over time.
Step-by-Step Guide to Nailing Shingles Architecturally
Installing shingles architecturally can be a complex process, but it doesn’t have to be. Here’s a step-by-step guide to help you get started:
1. Preparing the Roof for Installation
The first step in installing shingles architecturally is to prepare the roof. This involves clearing away any debris, checking for any existing damage, and making sure the surface is level. If there are any repairs needed, they should be completed before the shingles are installed.
2. Laying Out the Course Lines
Once the roof is prepared, the next step is to lay out the course lines. This involves measuring and marking off the locations where the shingles will be placed. It’s important to make sure the lines are straight and that the courses are marked off clearly.
3. Measuring and Cutting the Shingles
After the course lines are laid out, the next step is to measure and cut the shingles. It’s important to make sure the shingles fit correctly, so take the time to measure twice and cut once. Once the shingles are cut, they should be ready to install.
4. Installing the Starter Course
The starter course is the first row of shingles that will be installed. The starter course should be installed along the edge of the roof, ensuring that each shingle is securely attached. Make sure to use the correct type of nails and apply adequate pressure when nailing the shingles into place.
5. Installing the Main Course
Once the starter course is installed, the main course can be installed. This involves laying out the shingles in a staggered pattern. Make sure to overlap each shingle by at least 2 inches and secure them into place with nails.
6. Finishing Touches
Once the main course is installed, the last step is to add the finishing touches. This includes sealing the edges of the shingles with roofing cement and applying roofing felt over the entire roof. After this is done, the roof is ready for use.

How to Install Shingles for an Attractive and Durable Roof
Installing shingles correctly is essential for an attractive and durable roof. Here are some tips for installing shingles the right way:
Choosing the Right Shingles
When choosing shingles for your roof, it’s important to consider the type of material, the size of the shingles, and the color. Asphalt shingles are the most common type of shingles, but there are also metal, wood, and slate shingles available. Make sure to choose shingles that are designed for your climate and that match the style of your home.
Understanding the Different Types of Shingle Installation
There are two main types of shingle installation: open valley and closed valley. Open valley is when the shingles are installed in a single layer, while closed valley is when the shingles are installed in two layers. It’s important to understand the differences between these two types of installations in order to ensure that your roof is properly installed.
Selecting the Appropriate Fasteners
The type of fasteners used to attach the shingles to the roof is just as important as the type of shingles used. Different types of nails are better suited for different types of shingles, so it’s important to select the appropriate fasteners for the job. Stainless steel nails are the most common type of fastener used for asphalt shingles.
Knowing the Best Practices for Nailing Shingles
It’s important to understand the best practices for nailing shingles. This includes using the right number of nails, applying adequate pressure, and double-checking measurements. Additionally, it’s important to make sure every shingle is securely fastened and to follow the manufacturer’s instructions.
The Basics of Nailing Shingles Architecturally
Nailing shingles architecturally requires an understanding of the different types of shingles and their installation requirements. Additionally, it’s important to know the proper nailing techniques and the best practices for nailing shingles. Here’s a brief overview of the basics of nailing shingles architecturally:
Different Types of Shingles
There are a variety of different types of shingles available, including asphalt, metal, wood, and slate. Each type of shingle has its own installation requirements, so it’s important to choose the right shingles for your roof.
Proper Nailing Techniques
Once you’ve chosen the right shingles for your roof, it’s important to understand the proper nailing techniques. This includes using the right type of nails, applying adequate pressure, and double-checking measurements. Additionally, it’s important to make sure every shingle is securely fastened and to follow the manufacturer’s instructions.
Understanding the Best Practices for Nailing Shingles
Finally, it’s important to understand the best practices for nailing shingles. This includes using the right number of nails, applying adequate pressure, and double-checking measurements. Additionally, it’s important to make sure every shingle is securely fastened and to follow the manufacturer’s instructions.
Tips for Installing Shingles the Right Way
Installing shingles the right way is essential for an attractive and durable roof. Here are some tips for installing shingles the right way:
Double Checking Measurements
Before nailing shingles into place, it’s important to double check the measurements. This ensures that the shingles fit correctly and that the roof looks neat and tidy. Additionally, it’s important to make sure the course lines are straight and that the shingles are overlapped correctly.
Making Sure Every Shingle Is Securely Fastened
Make sure to use the correct type of nails and apply adequate pressure when nailing shingles into place. This ensures that every shingle is securely fastened and that the roof is properly installed.
Following Manufacturer Instructions
Finally, it’s important to follow the manufacturer’s instructions. Different types of shingles require different types of nails and different installation techniques, so make sure to follow the manufacturer’s instructions for the best results.

The Best Practices for Nailing Shingles Architecturally
Nailing shingles architecturally is an important skill for anyone looking to install a roof. Here are some of the best practices for nailing shingles architecturally:
Understanding the Different Types of Nails
It’s important to understand the different types of nails used in nailing shingles. Different types of nails are better suited for different types of shingles, so make sure to select the appropriate fasteners for the job. Stainless steel nails are the most common type of fastener used for asphalt shingles.
Using the Right Number of Nails
When nailing shingles into place, it’s important to use the right number of nails. Generally, three nails per shingle are recommended. Additionally, make sure to space the nails evenly across the shingle and make sure each nail is securely fastened.
Applying Adequate Pressure
It’s important to apply adequate pressure when nailing shingles into place. This ensures that the shingles are securely attached and won’t shift or become loose over time. Additionally, it’s important to make sure the nails are driven straight and flush with the shingle.

What You Need to Know About Nailing Shingles Architecturally
Nailing shingles architecturally is an important skill for anyone looking to install a roof. To ensure that your roof is properly installed and looks its best, it’s important to understand the different types of nails used, the best practices for nailing shingles, and the different types of shingles and their installation requirements.
Conclusion
Installing shingles architecturally is an important skill for anyone looking to install a roof. It’s important to understand the different types of nails used, the best practices for nailing shingles, and the different types of shingles and their installation requirements. By following these steps and tips, you can ensure that your roof is properly installed and looks its best.
Summary
In conclusion, nailing shingles architecturally is an important skill for anyone looking to install a roof. It’s important to understand the different types of nails used, the best practices for nailing shingles, and the different types of shingles and their installation requirements. Additionally, it’s important to use the right number of nails, apply adequate pressure, and double-check measurements. Following these steps and tips will ensure that your roof is properly installed and looks its best.
Final Thoughts
Installing shingles architecturally is a complex process, but it doesn’t have to be. With the right tools and knowledge, anyone can learn how to nail shingles architecturally. By following the steps outlined in this article, you can ensure that your roof is properly installed and looks its best.
(Note: Is this article not meeting your expectations? Do you have knowledge or insights to share? Unlock new opportunities and expand your reach by joining our authors team. Click Registration to join us and share your expertise with our readers.)